...
Step-by-Step Guide
Samsung Email App
Sub-Step # | Instruction | Screenshot |
|---|---|---|
1.1 | Tap Email to open the Samsung Mail client. It may be in a different location on your phone, as each is set up differently. | 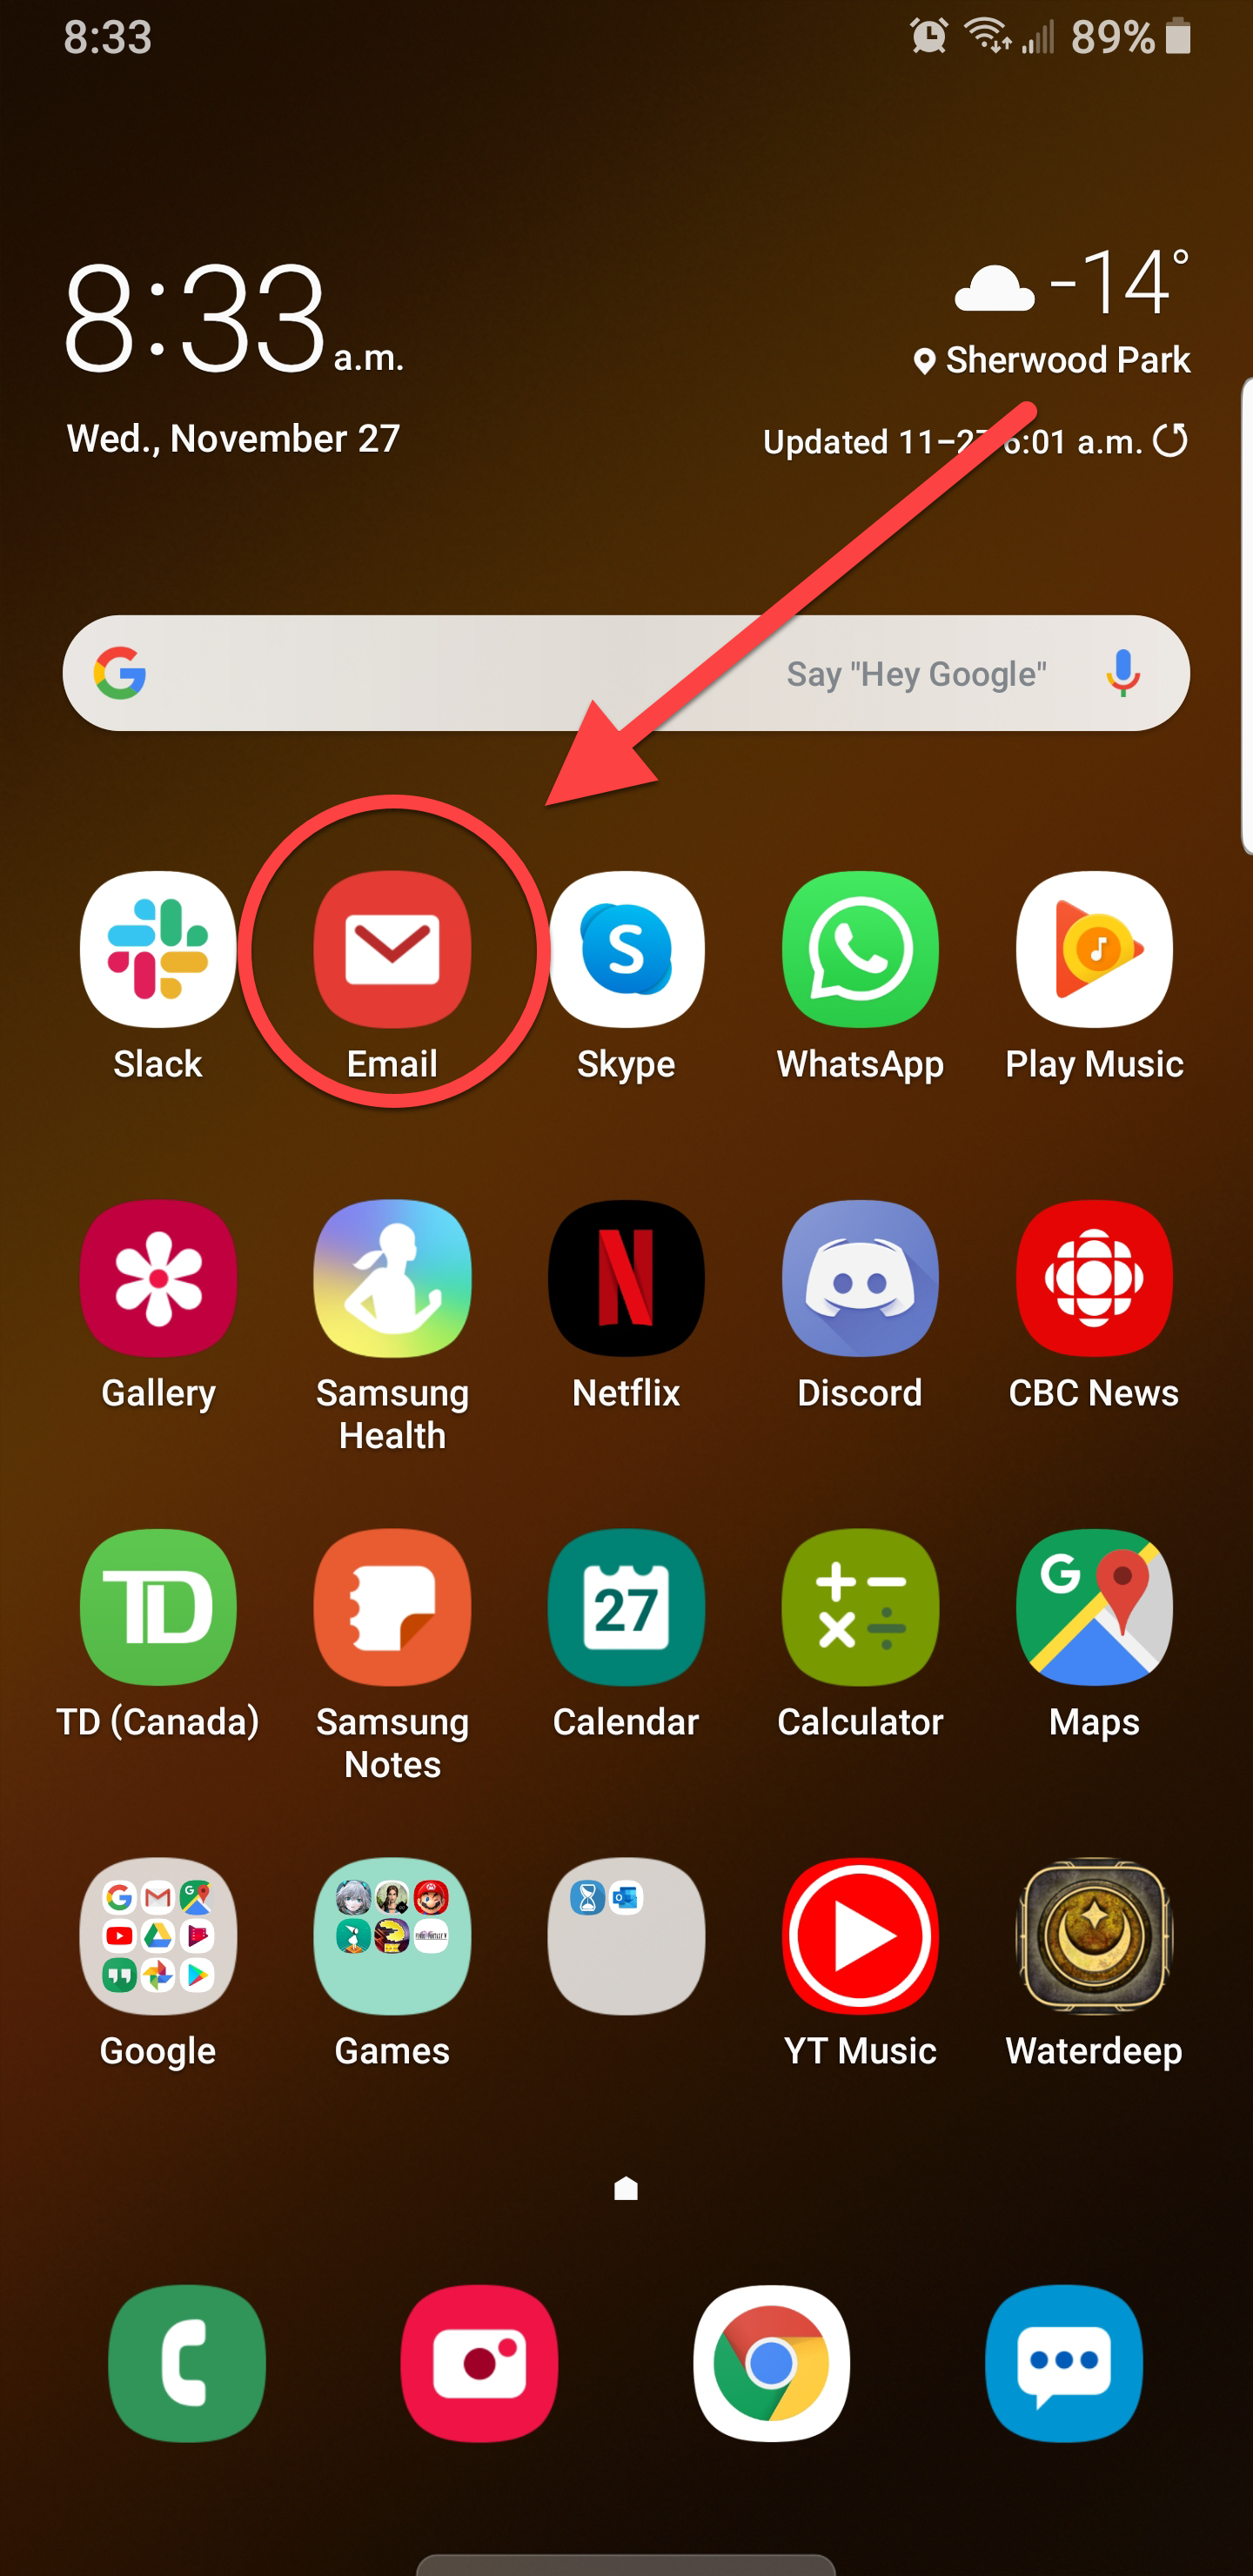 |
1.2 | Once it opens, tap on the three bars on the top left. This will open the menu where you can see your email accounts and settings. | 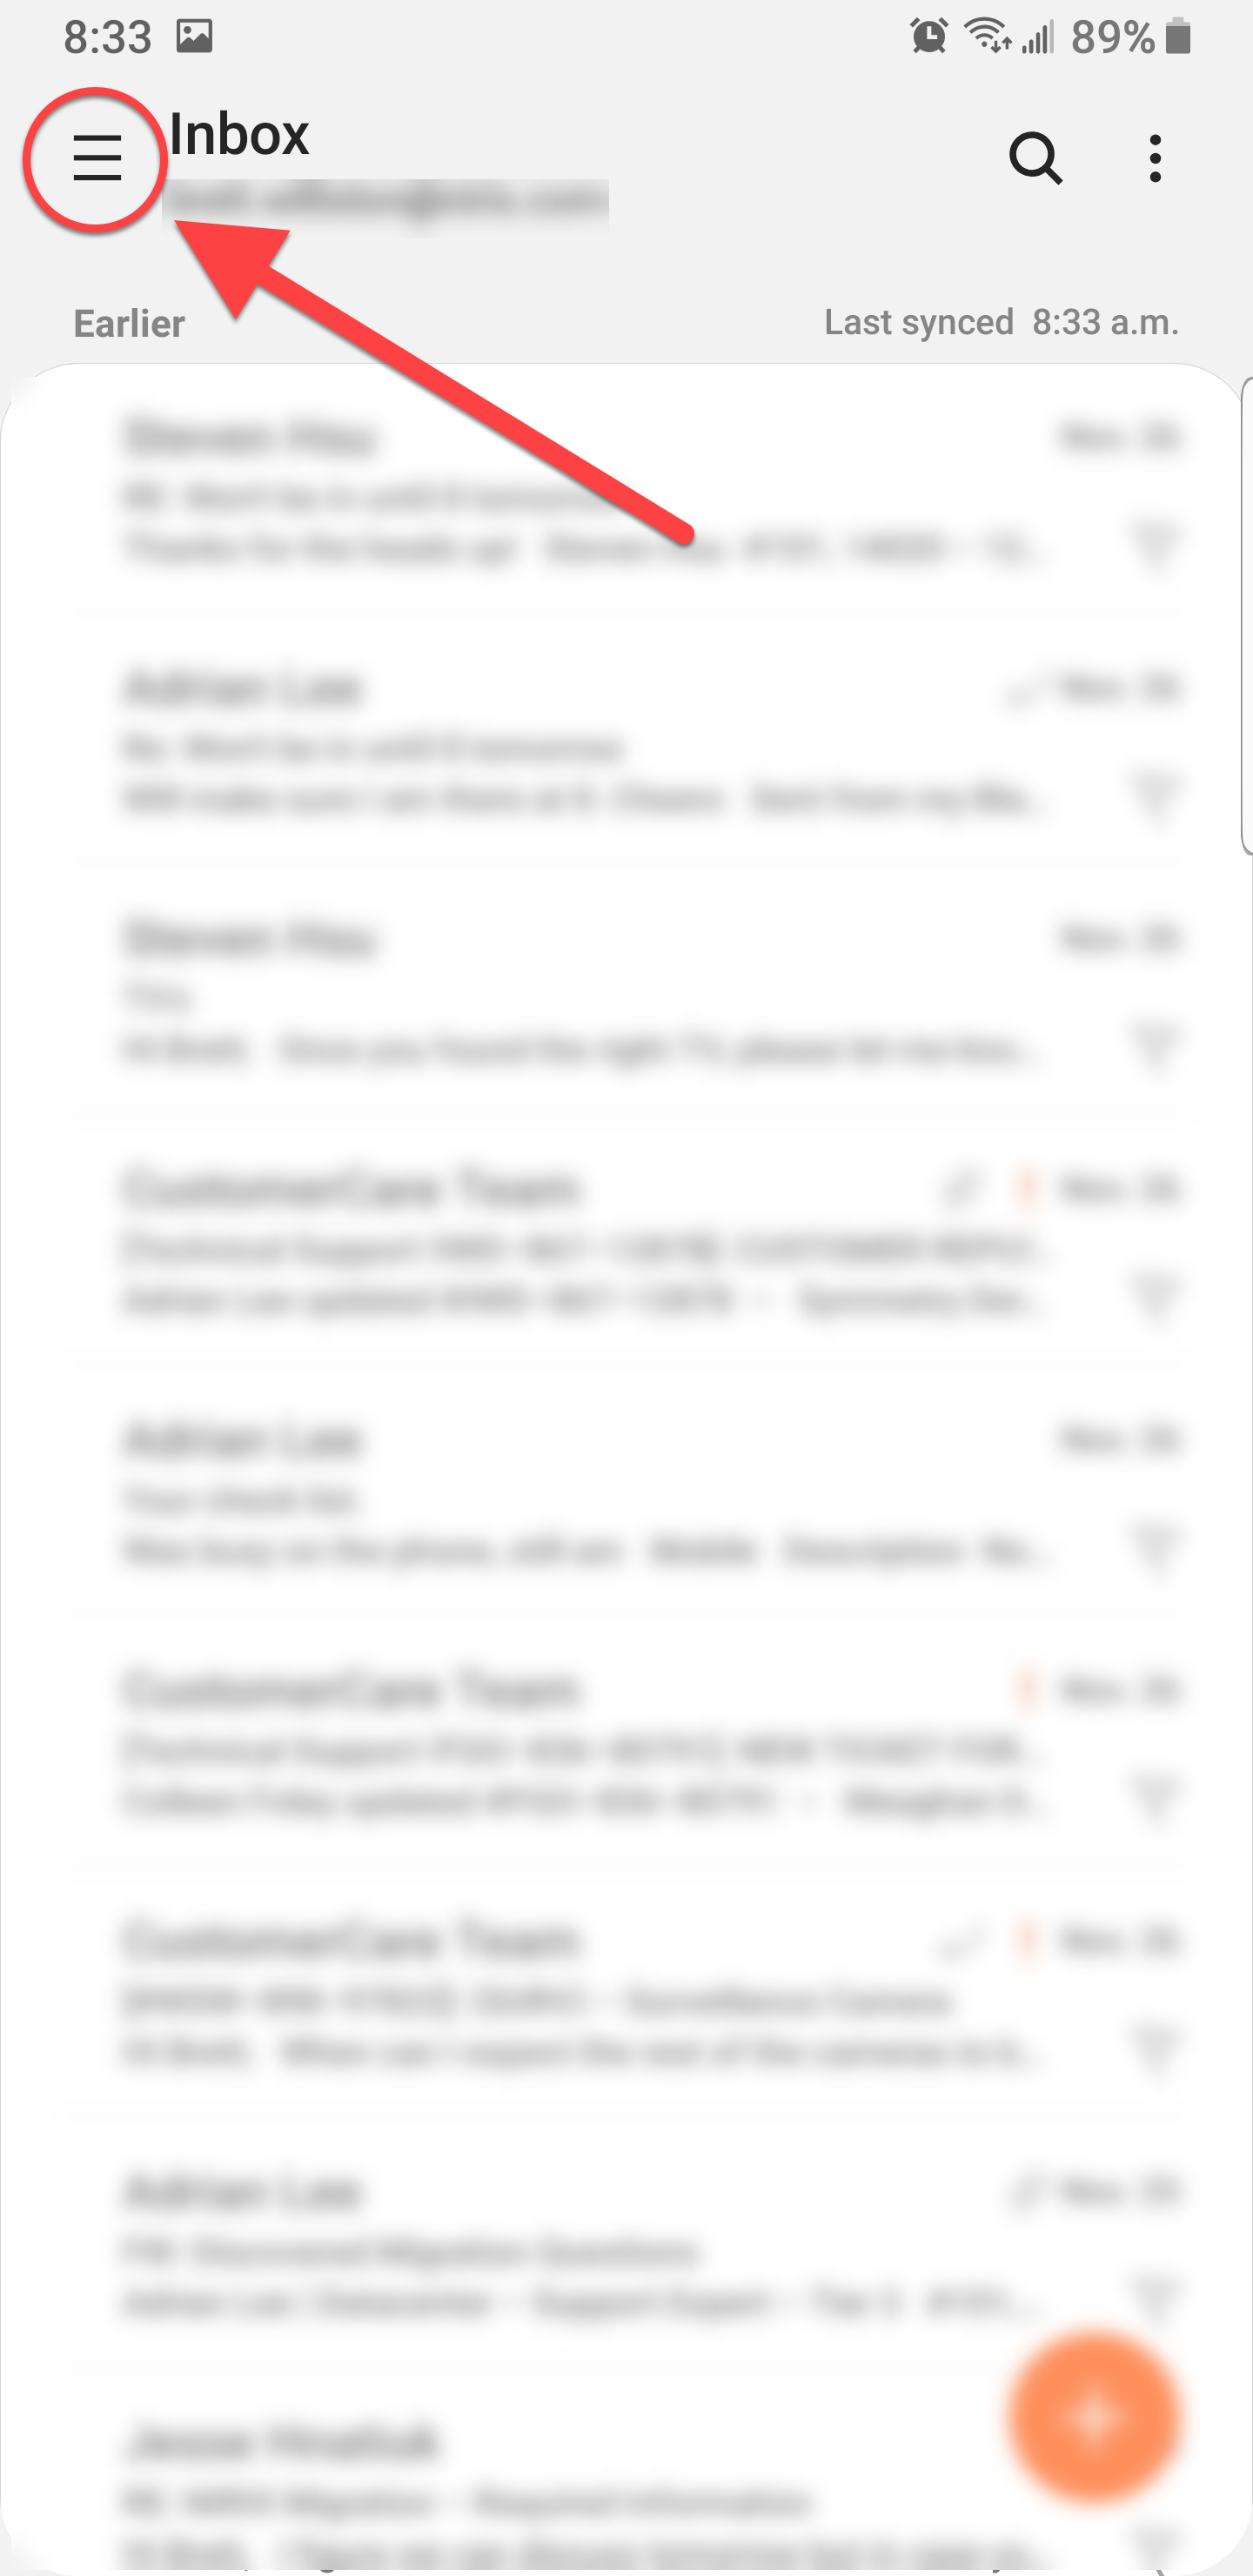 |
1.3 | Tap the gear icon on the top right of the menu screen. This will load the settings menu. | 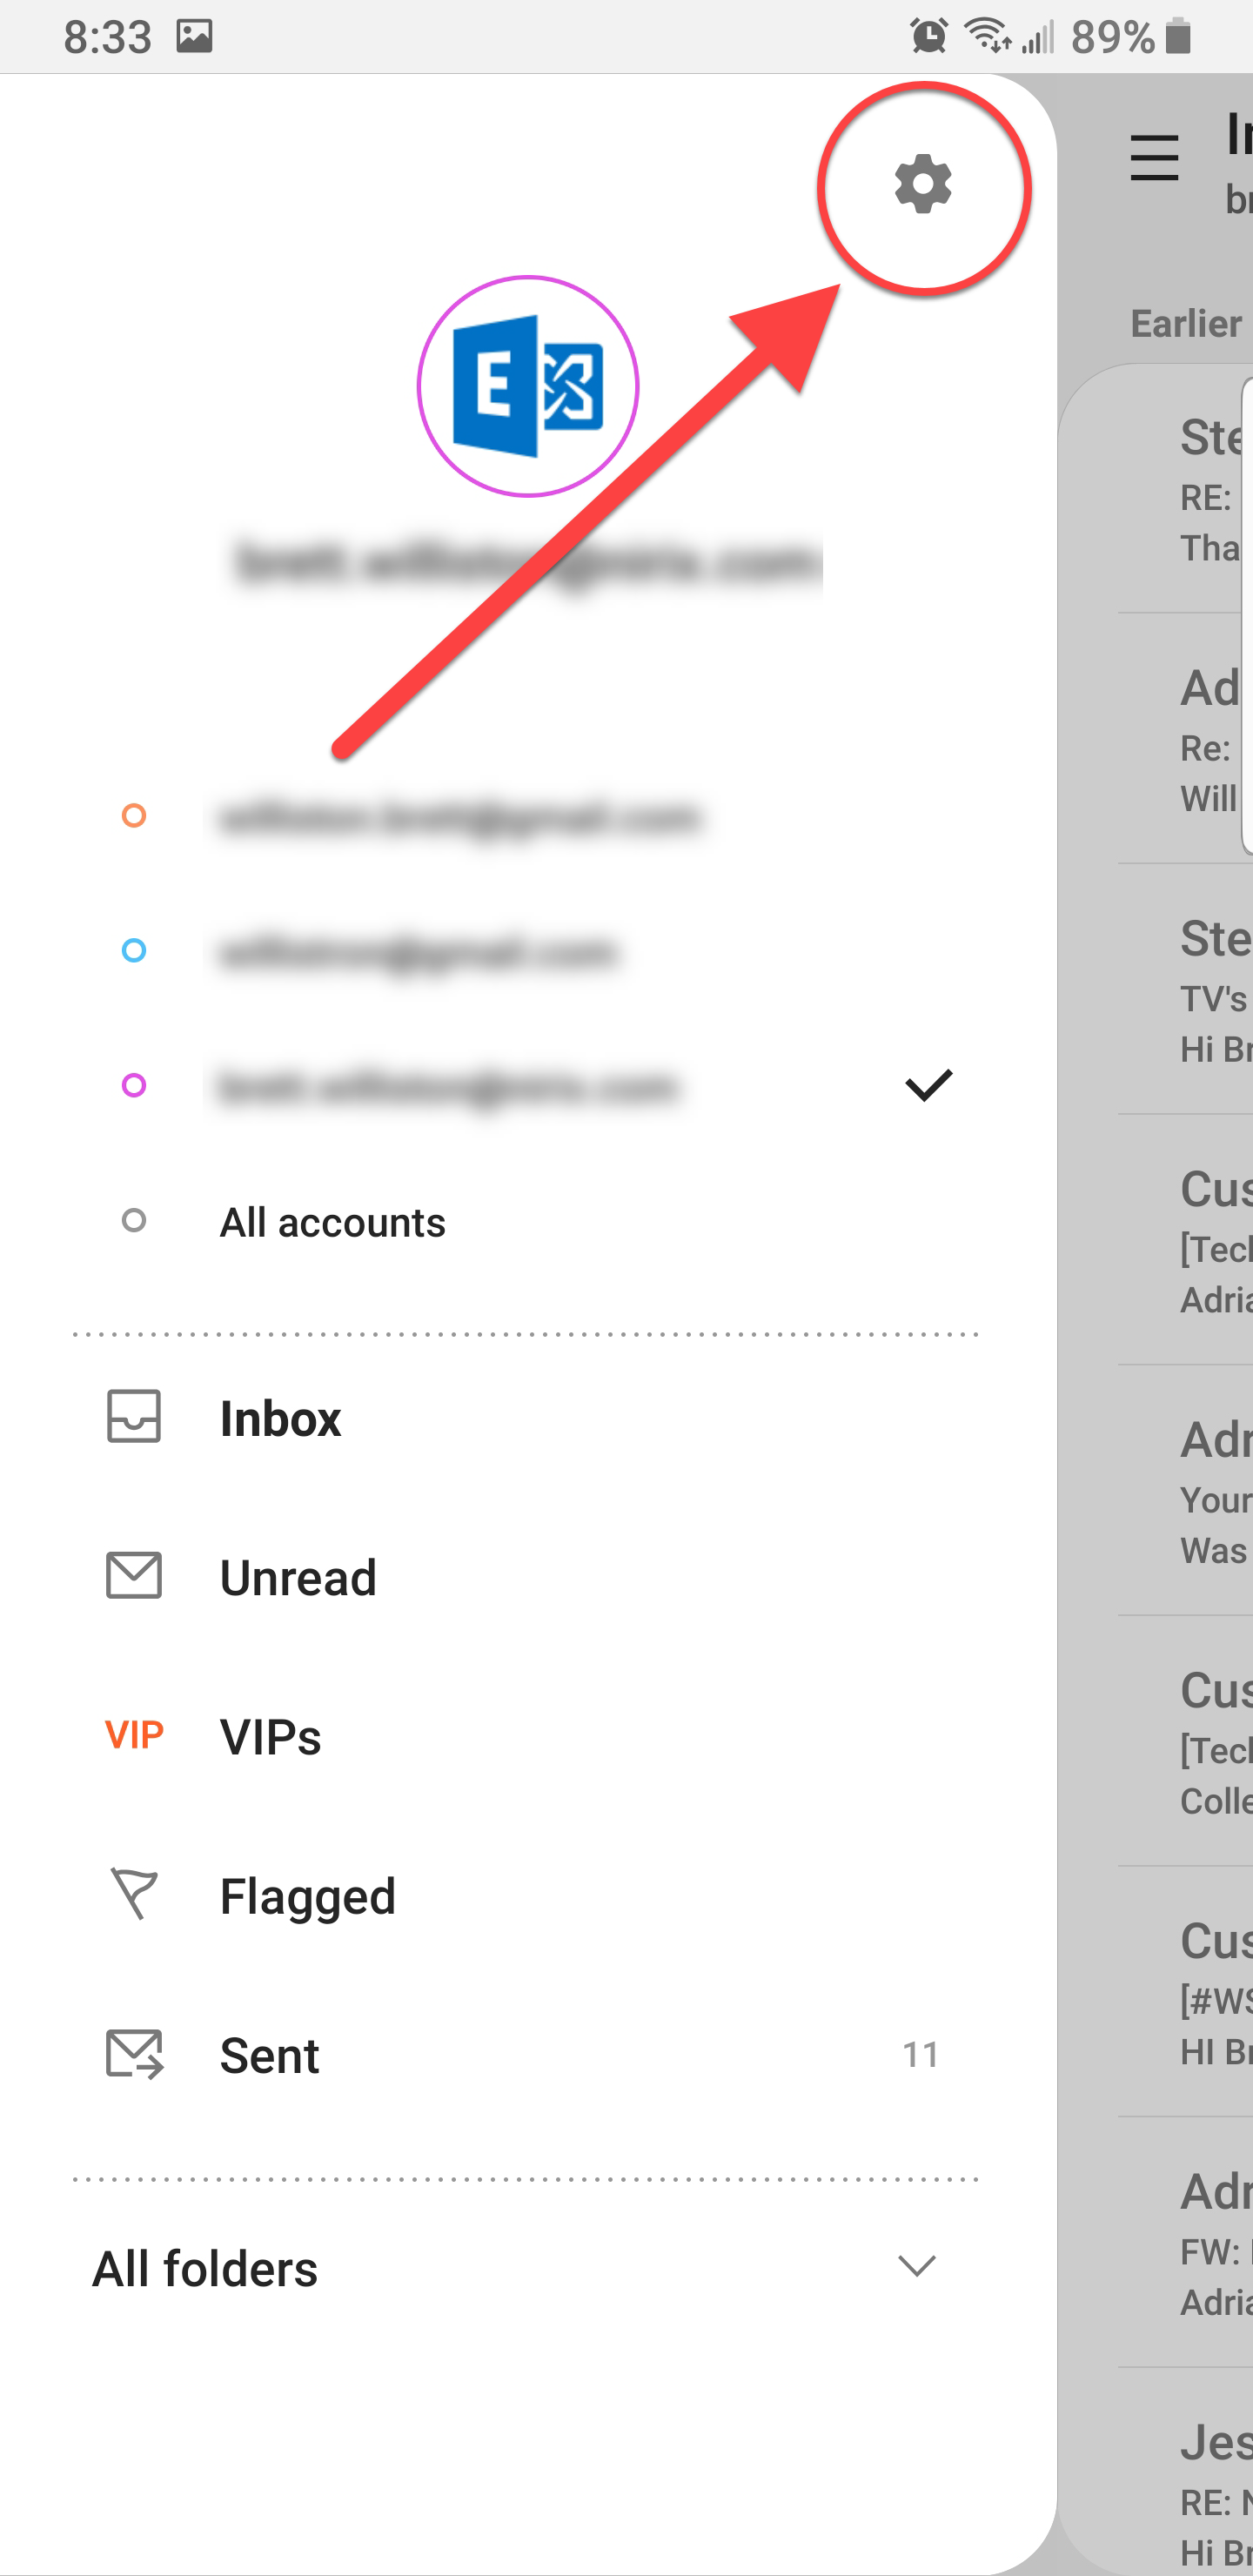 |
1.4 | Tap on + Add account to add a new account. | 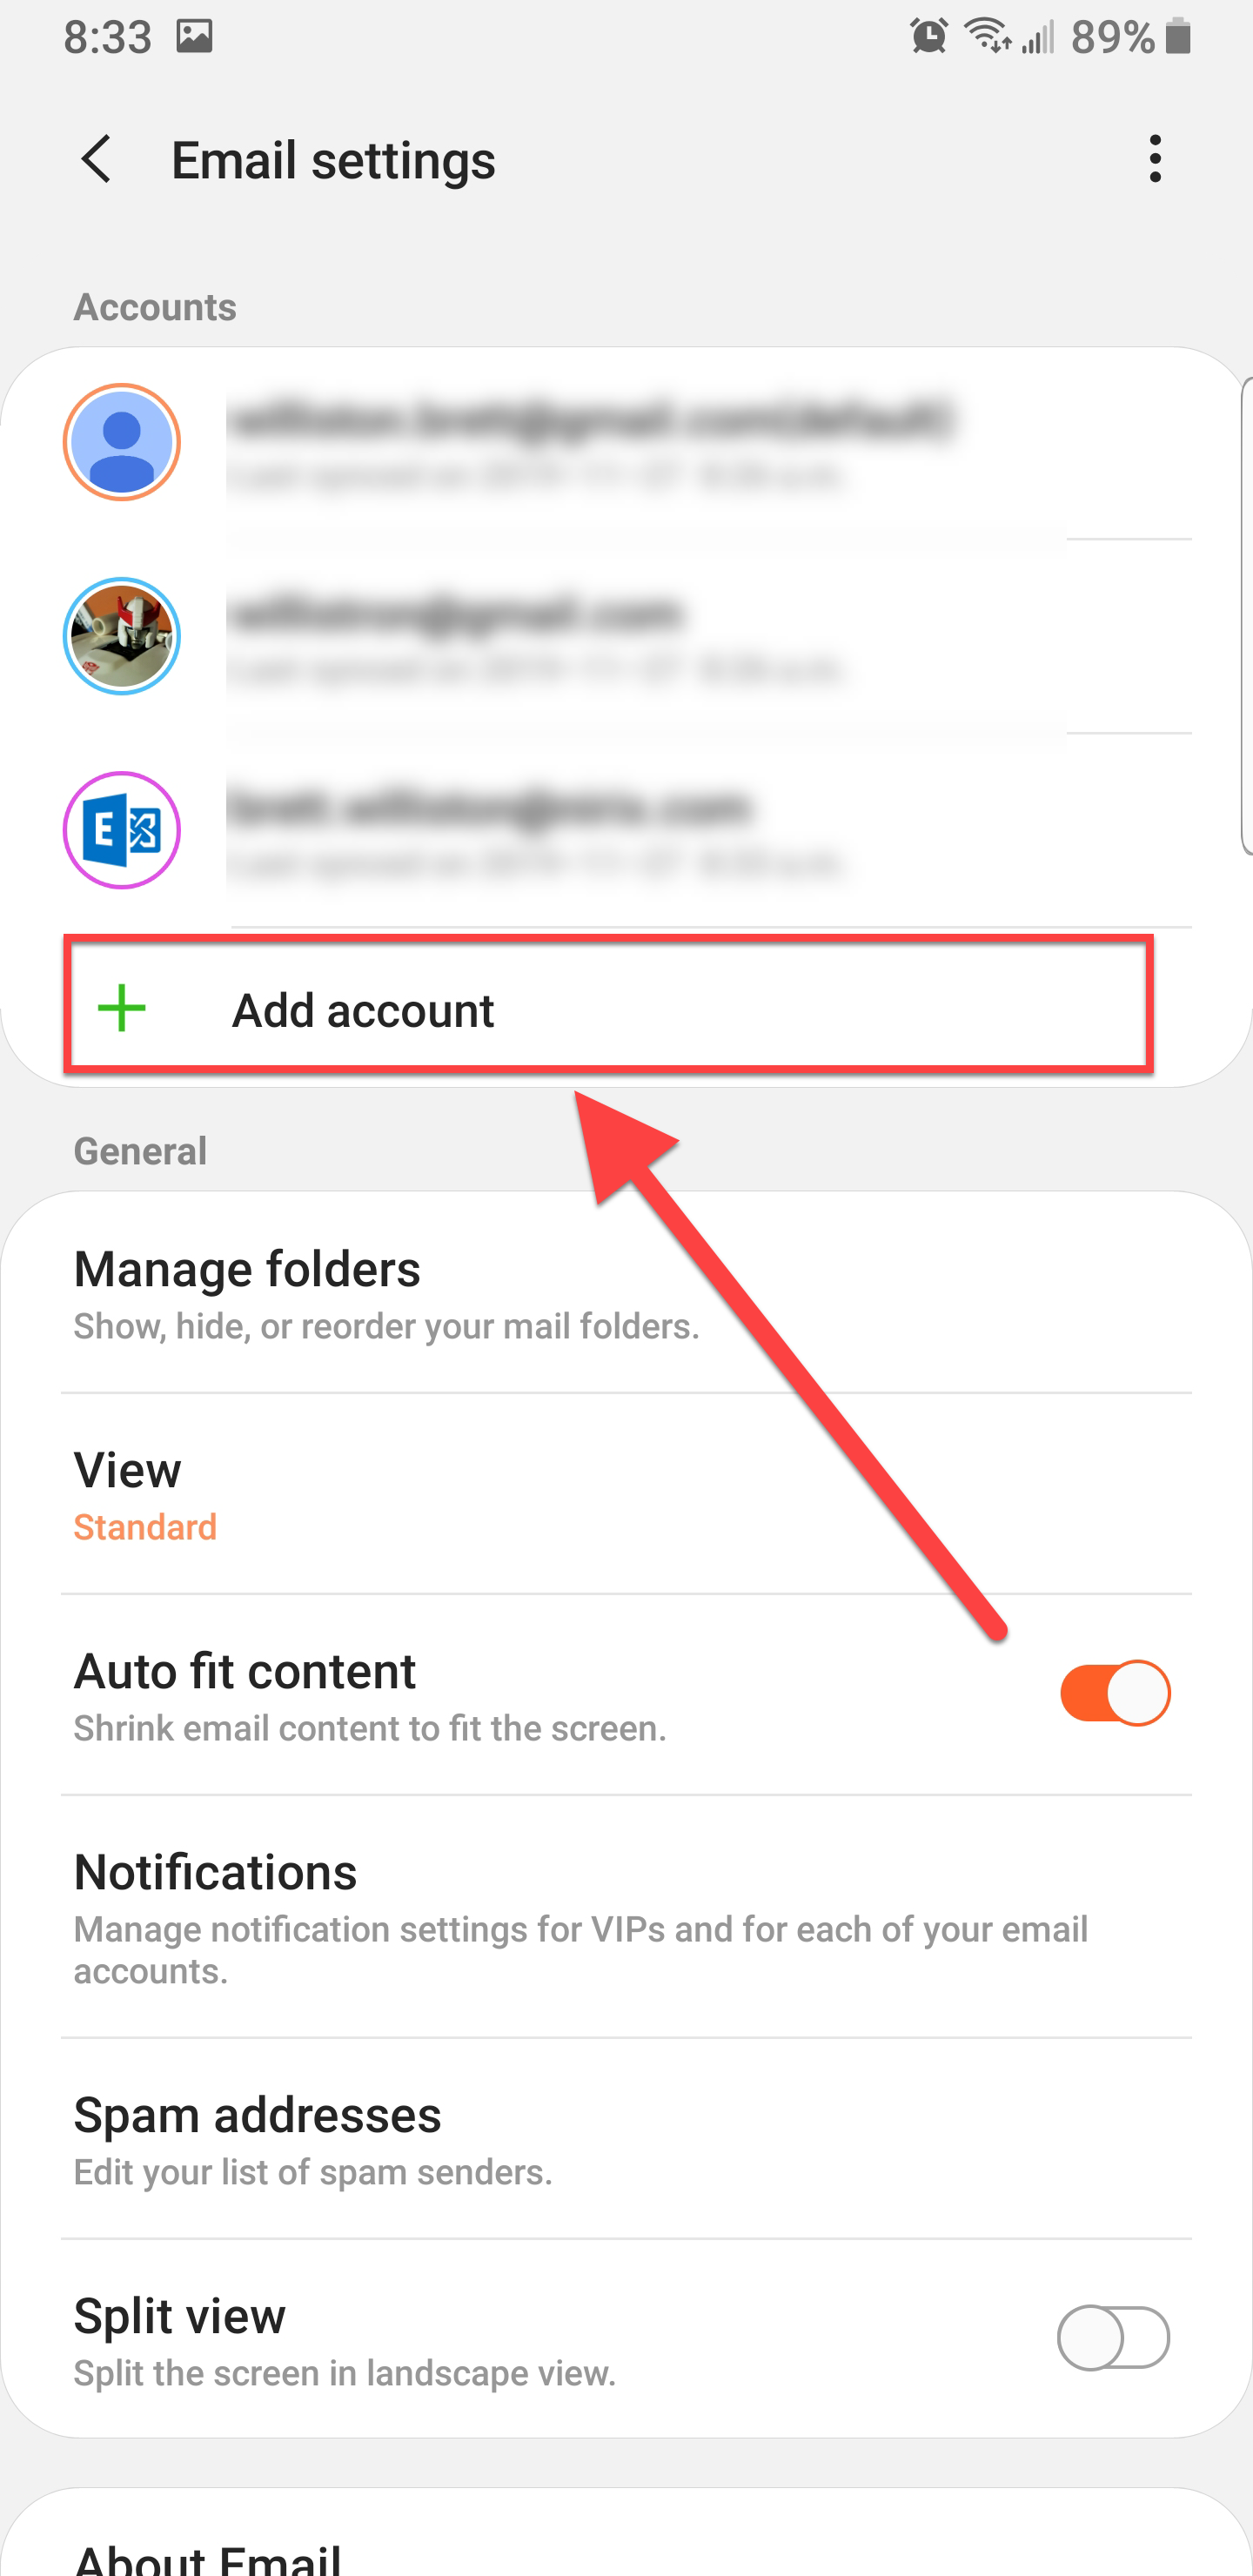 |
1.5 | Tap on Exchange. | 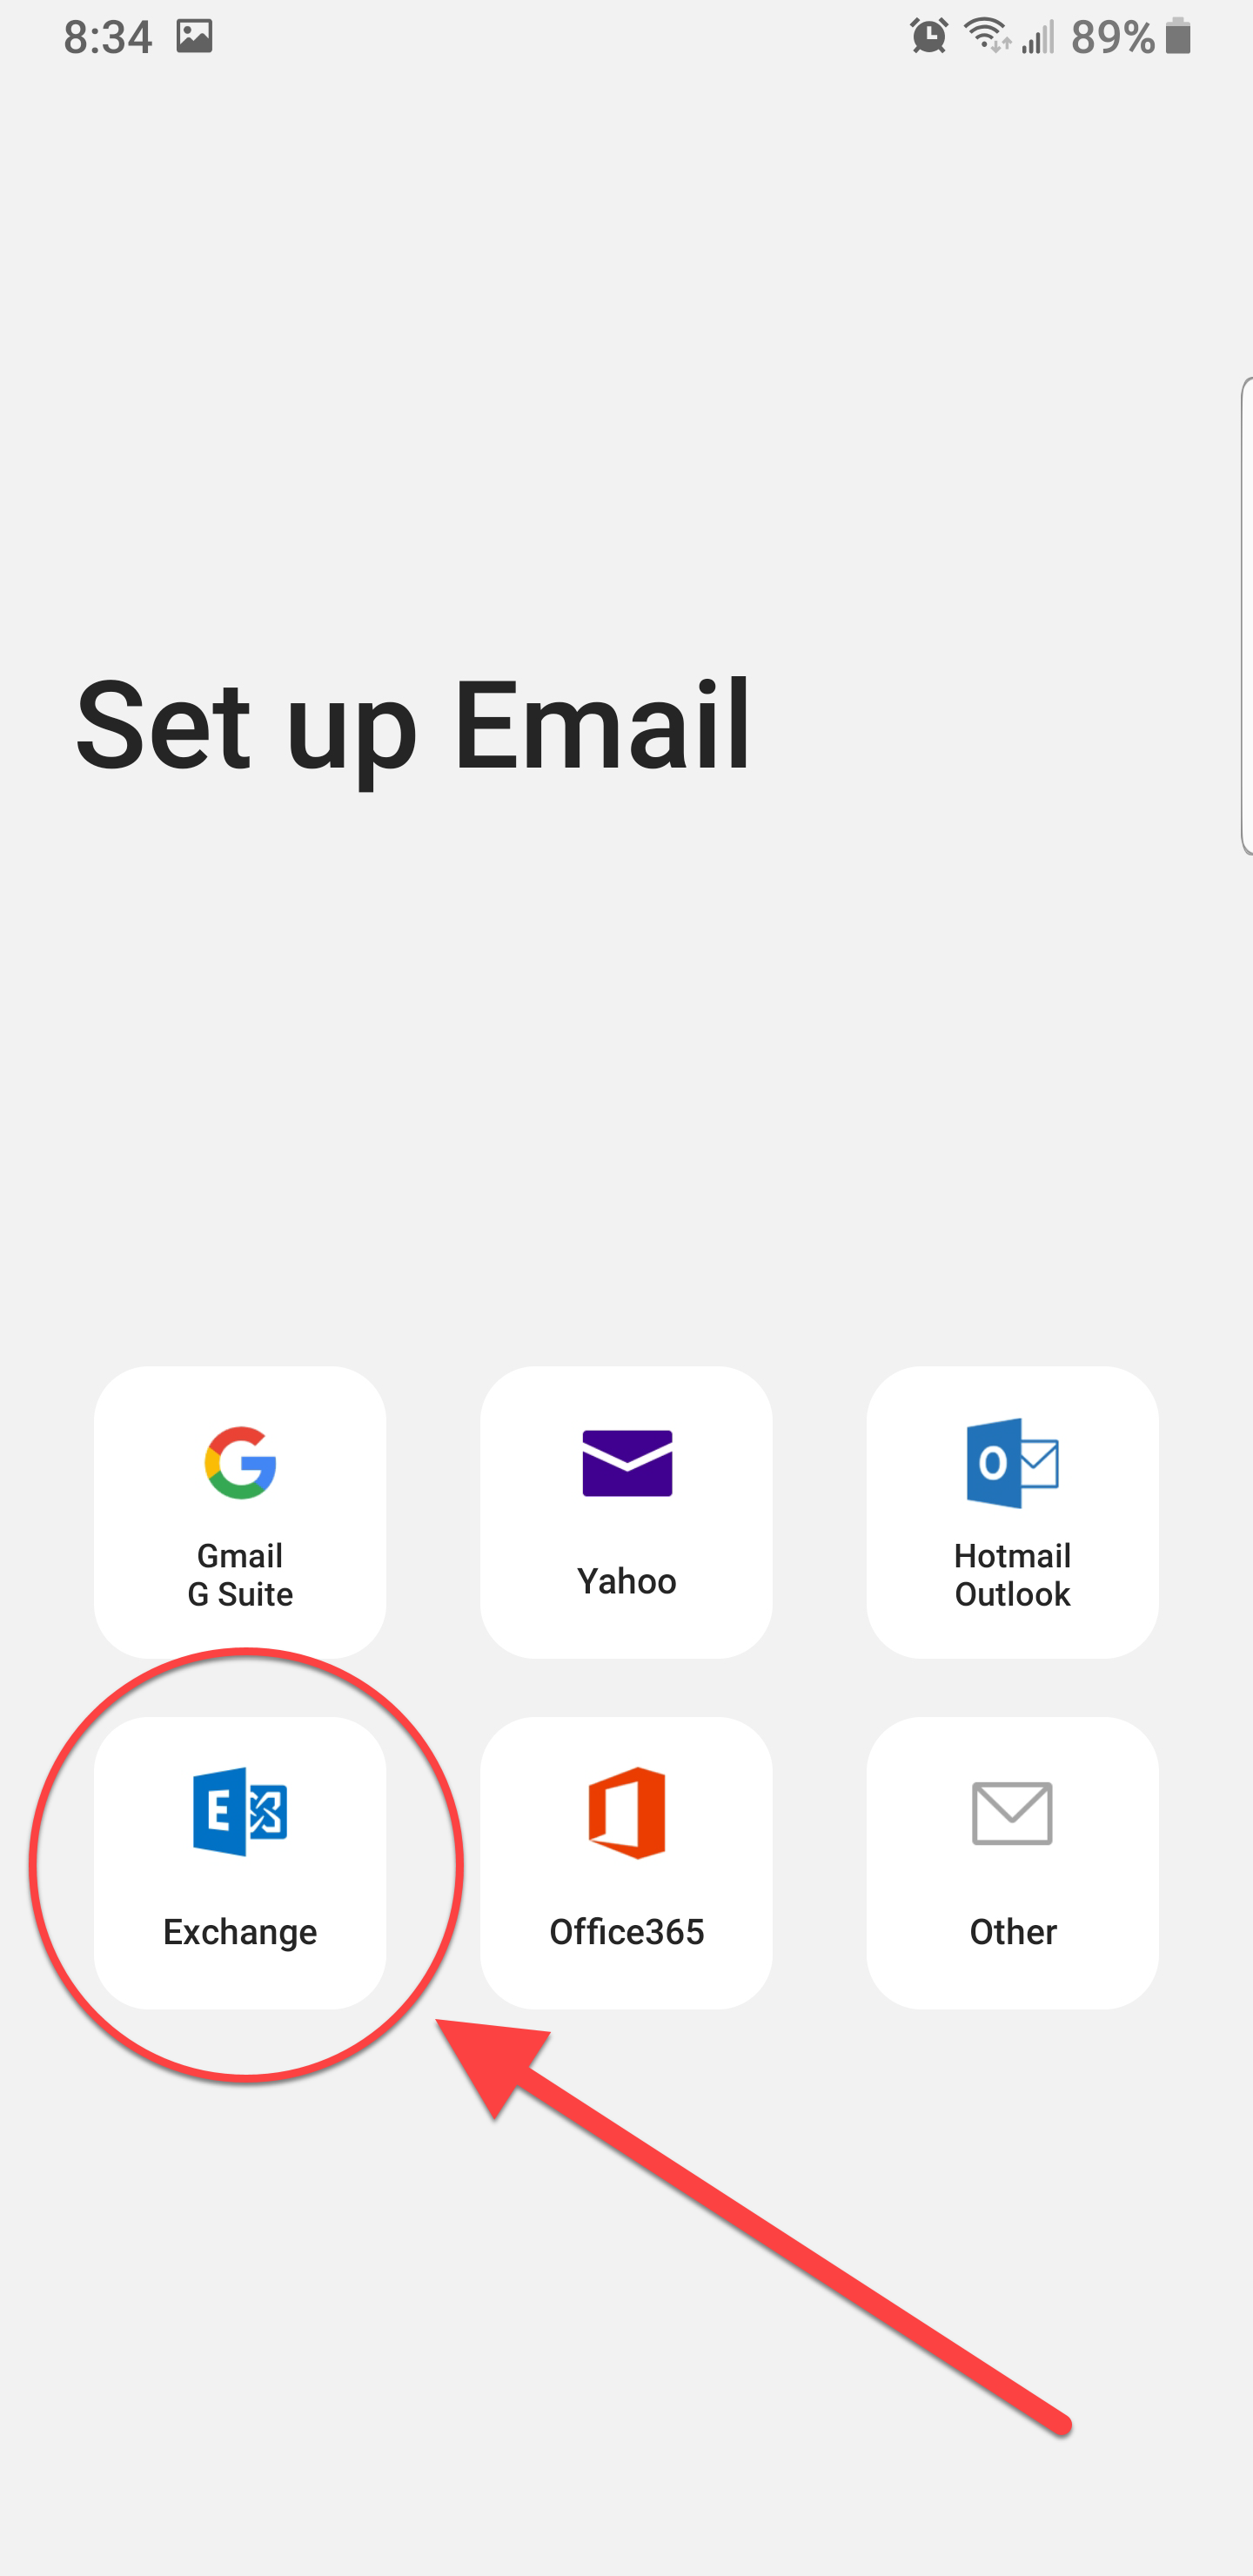 |
1.6 | Type in your full email address, as well as your password. If you want this to be the default account, click Set as default account. Once done, tap Manual setup. | 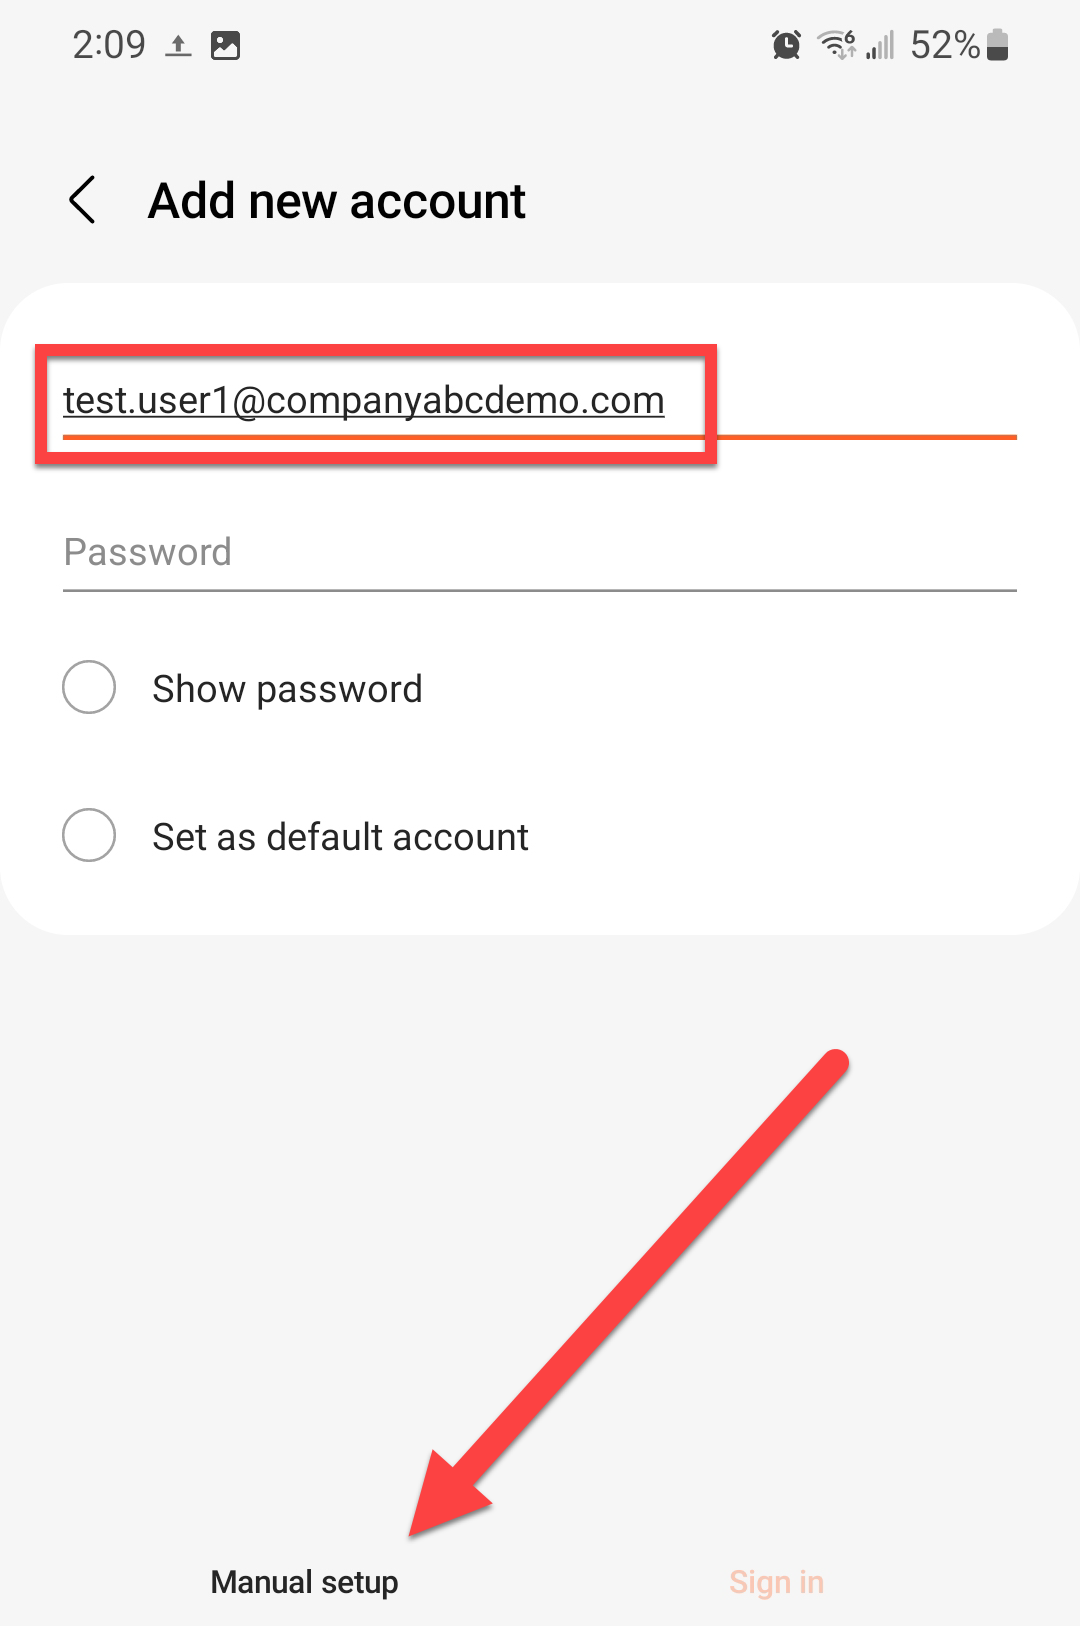 |
1.7 | Your email address and password should have carried over from the previous step. If not, enter them. Under Domain\username enter your full email address once again. For exchange server, enter webmail.poweredbynirix.com Tap Sign in. | 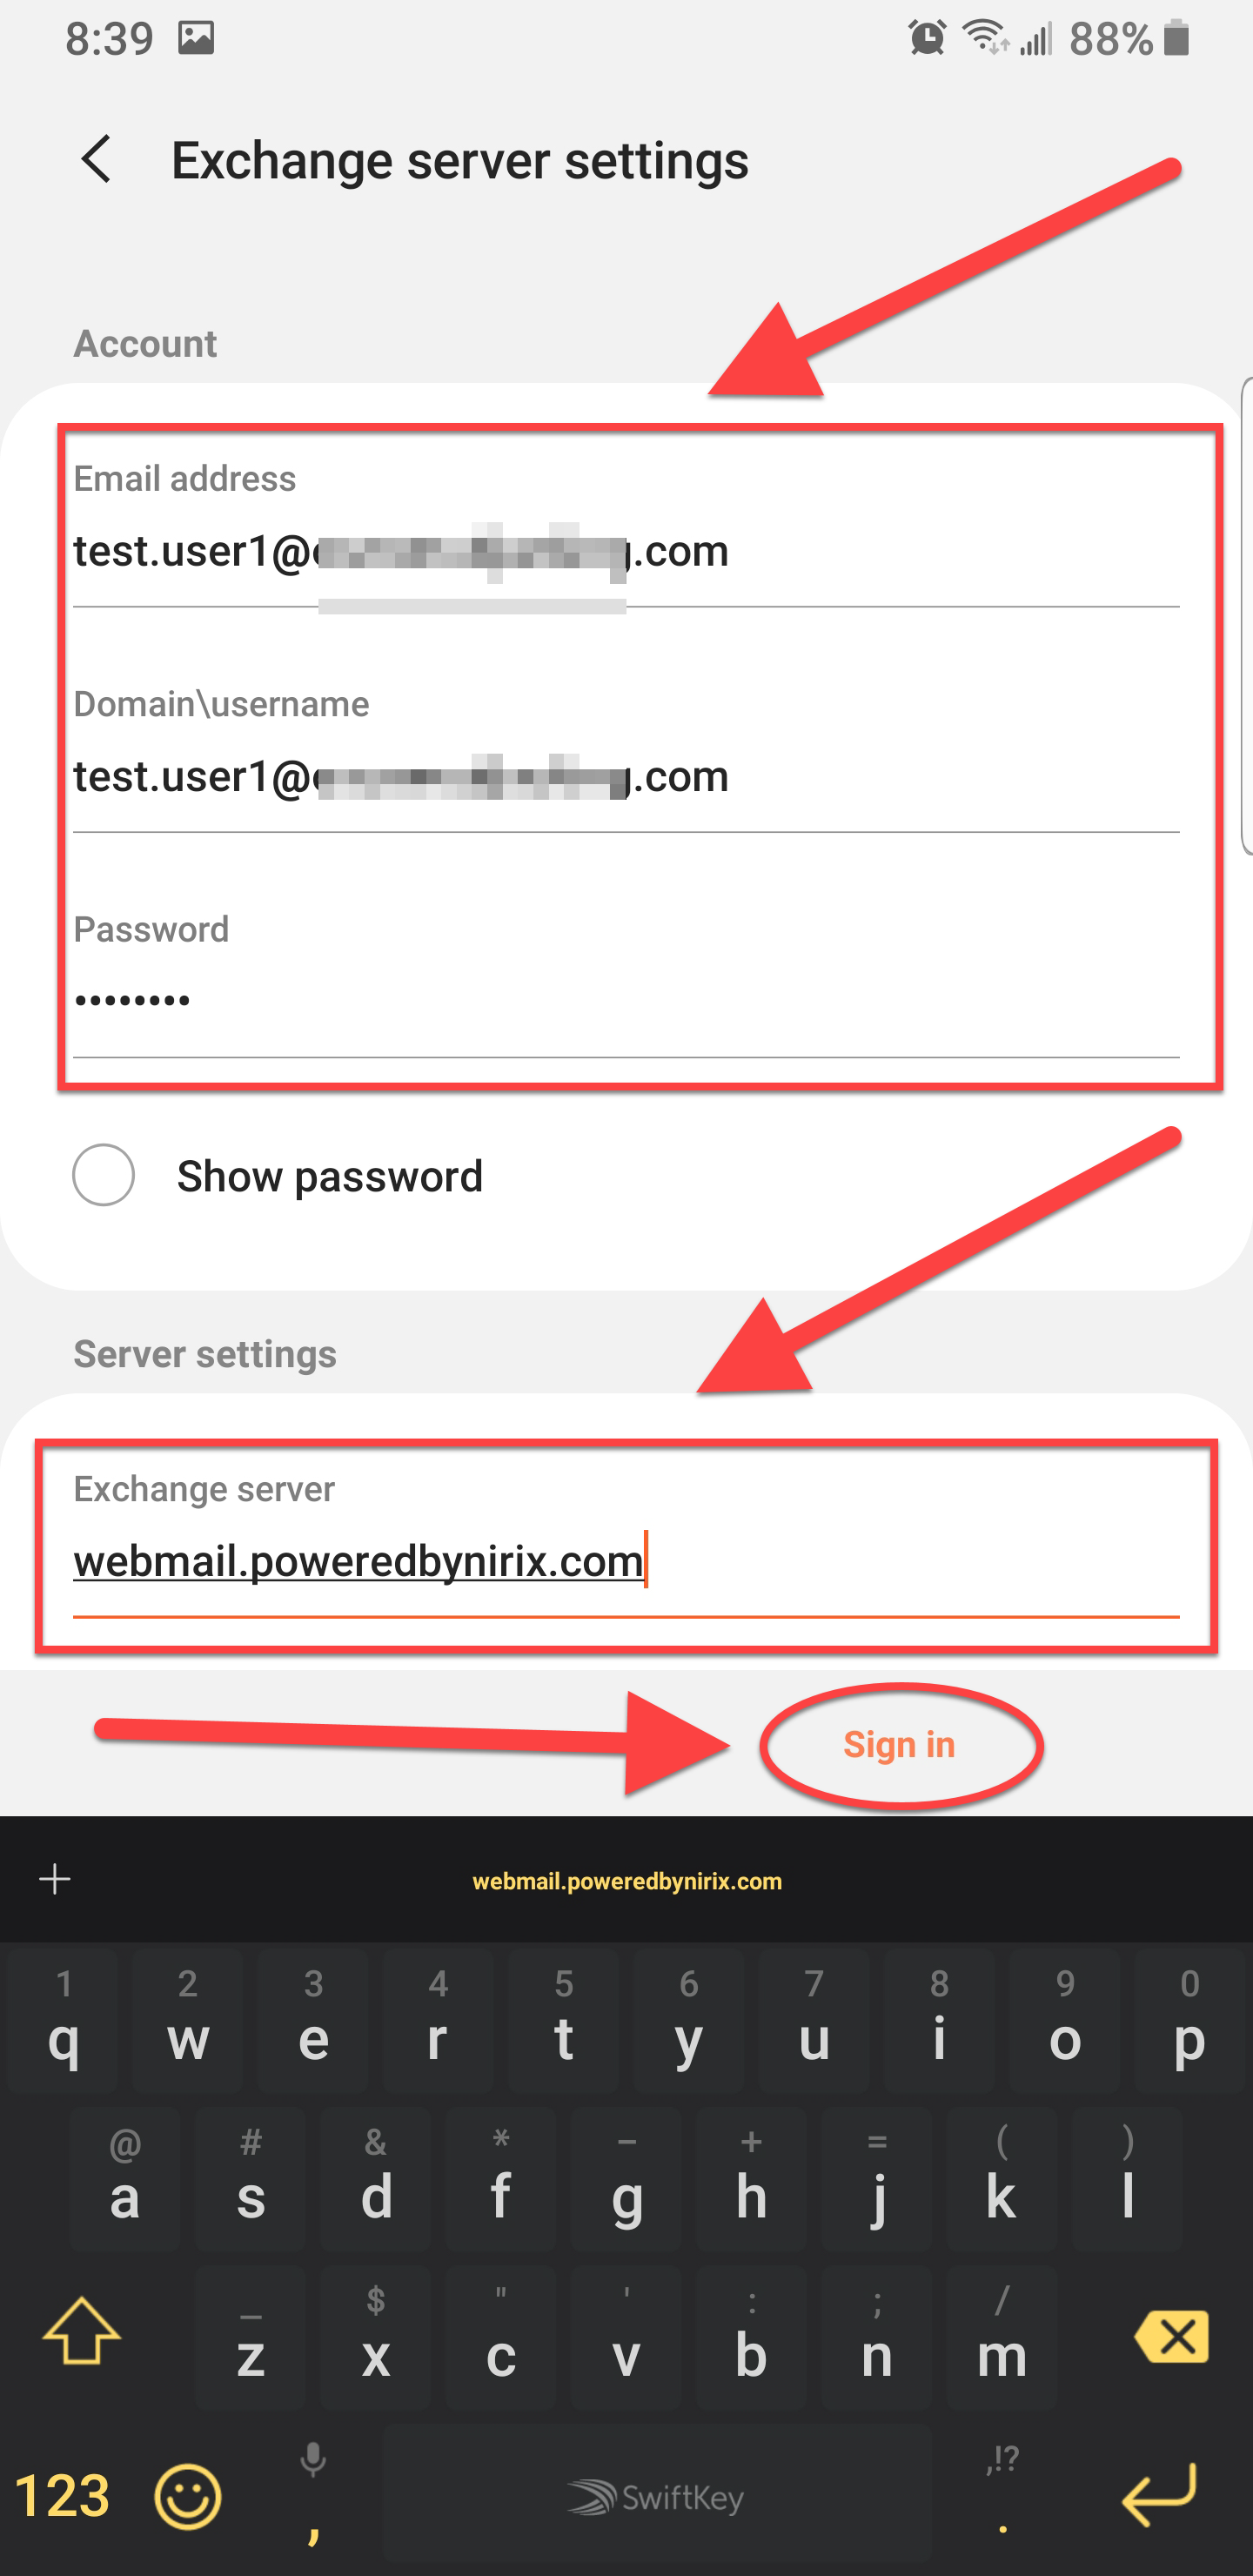 |
1.8 | It will check to ensure the settings are correct. If something isn't entered correctly, it will return you to the previous screen. | 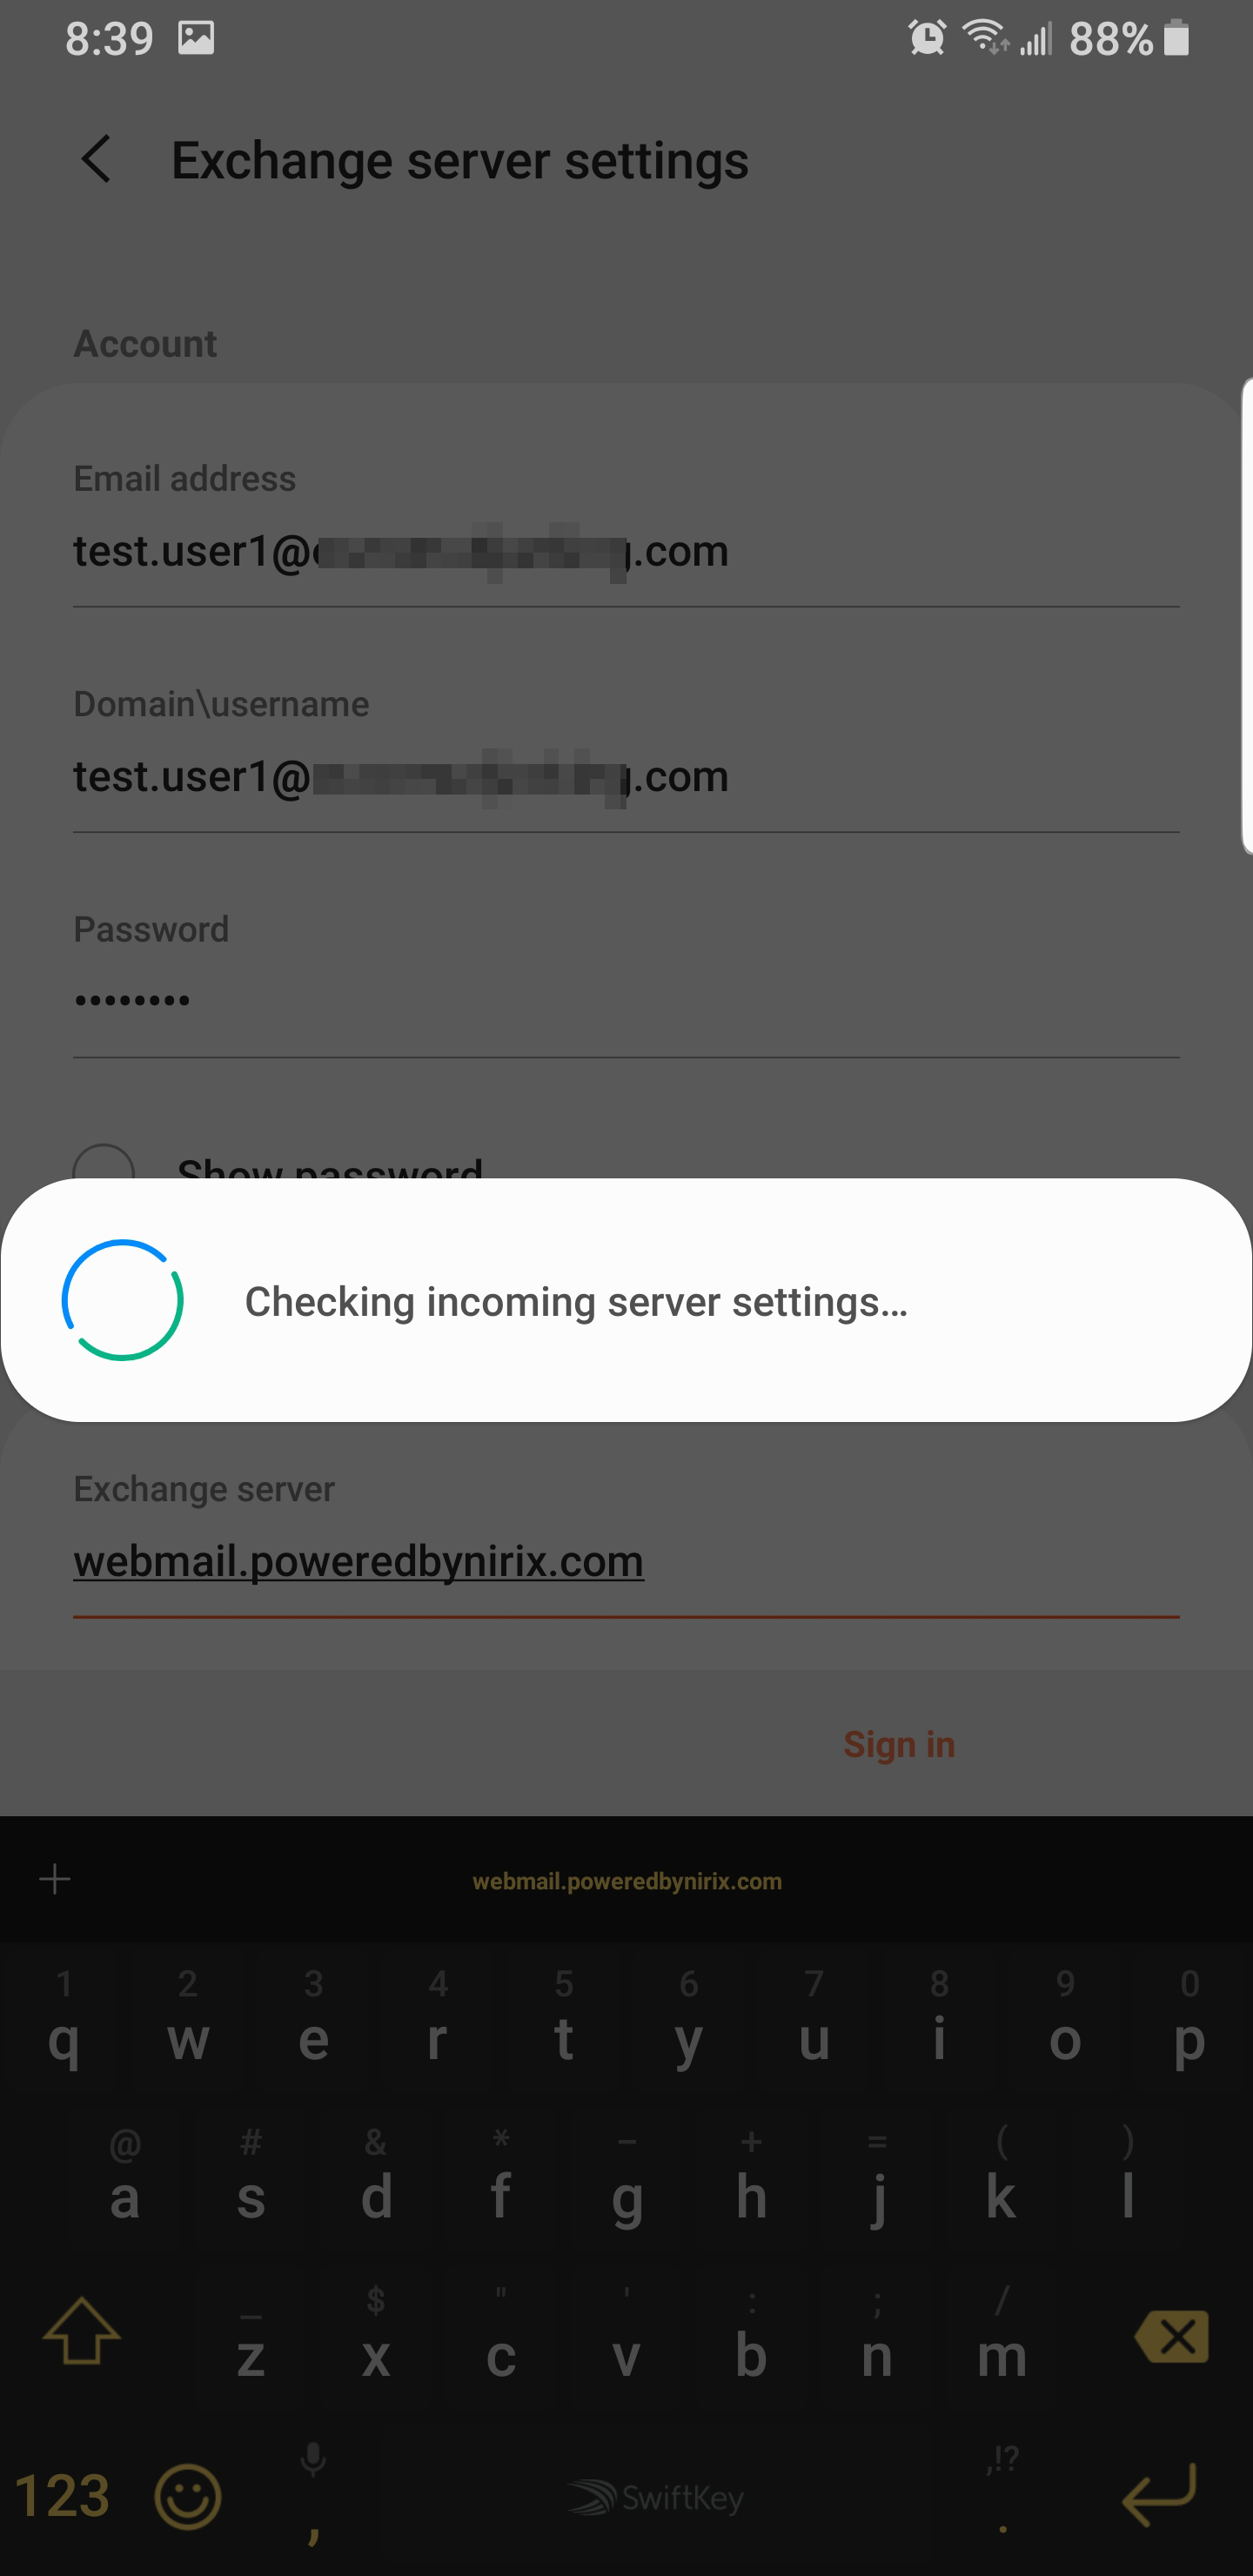 |
1.9 | Click Apply to set the security permissions for the organization on your phone. | 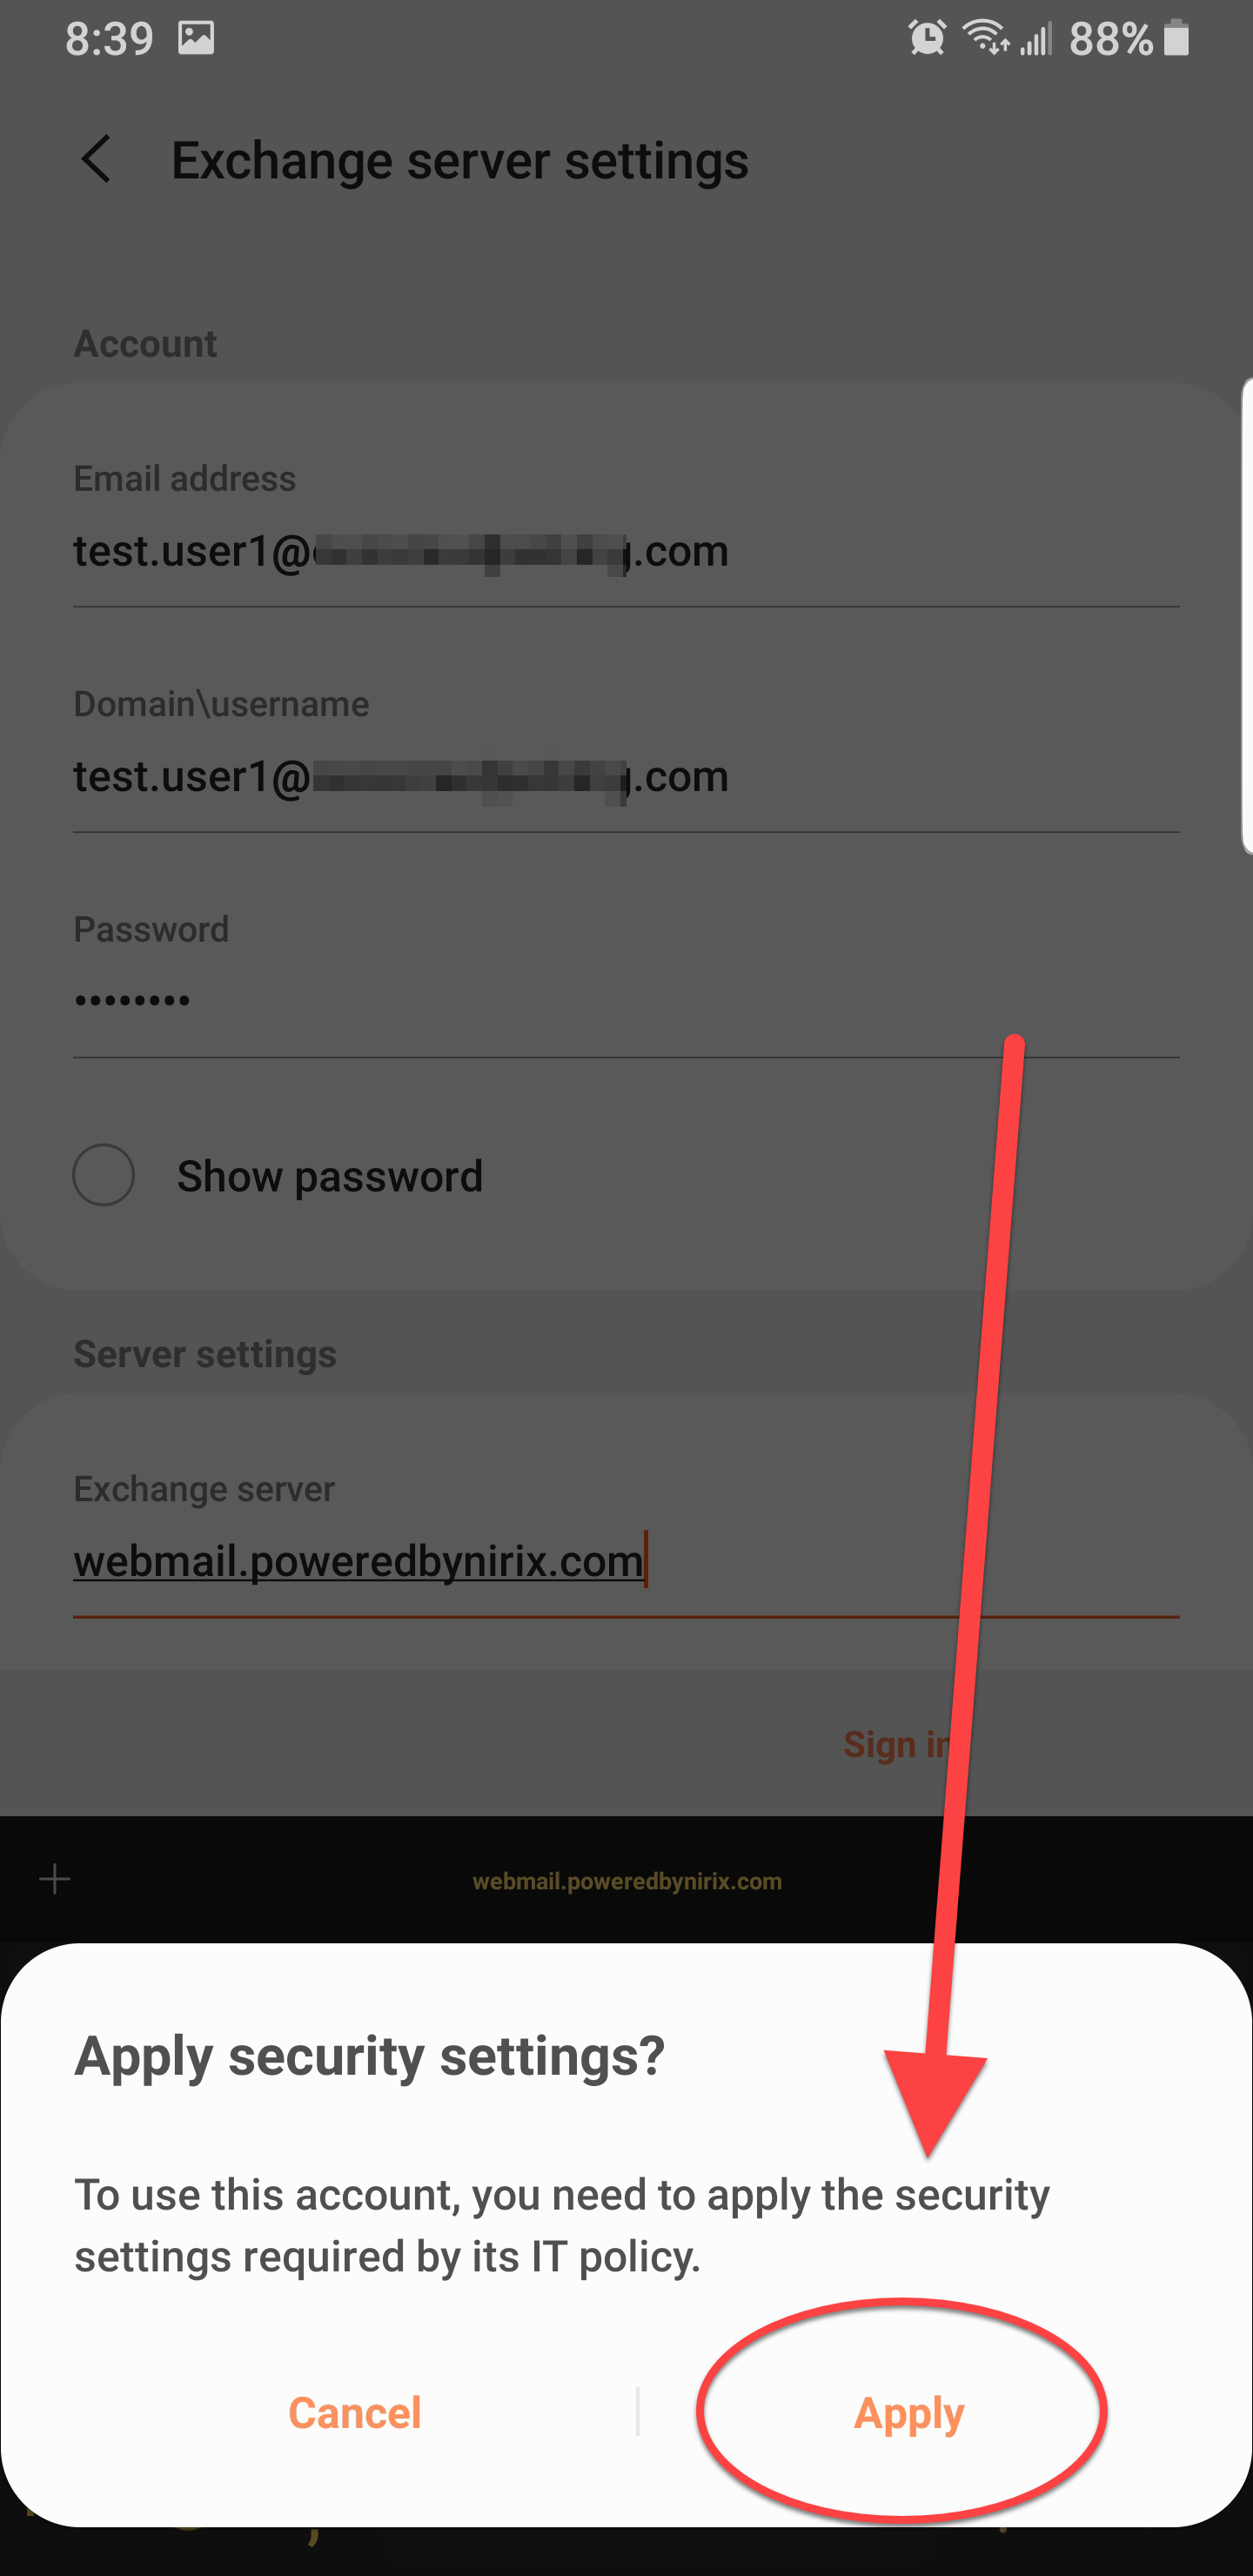 |
1.10 | Once completed, your new account will be set. To switch between mailboxes tap the three bars on the top left. | 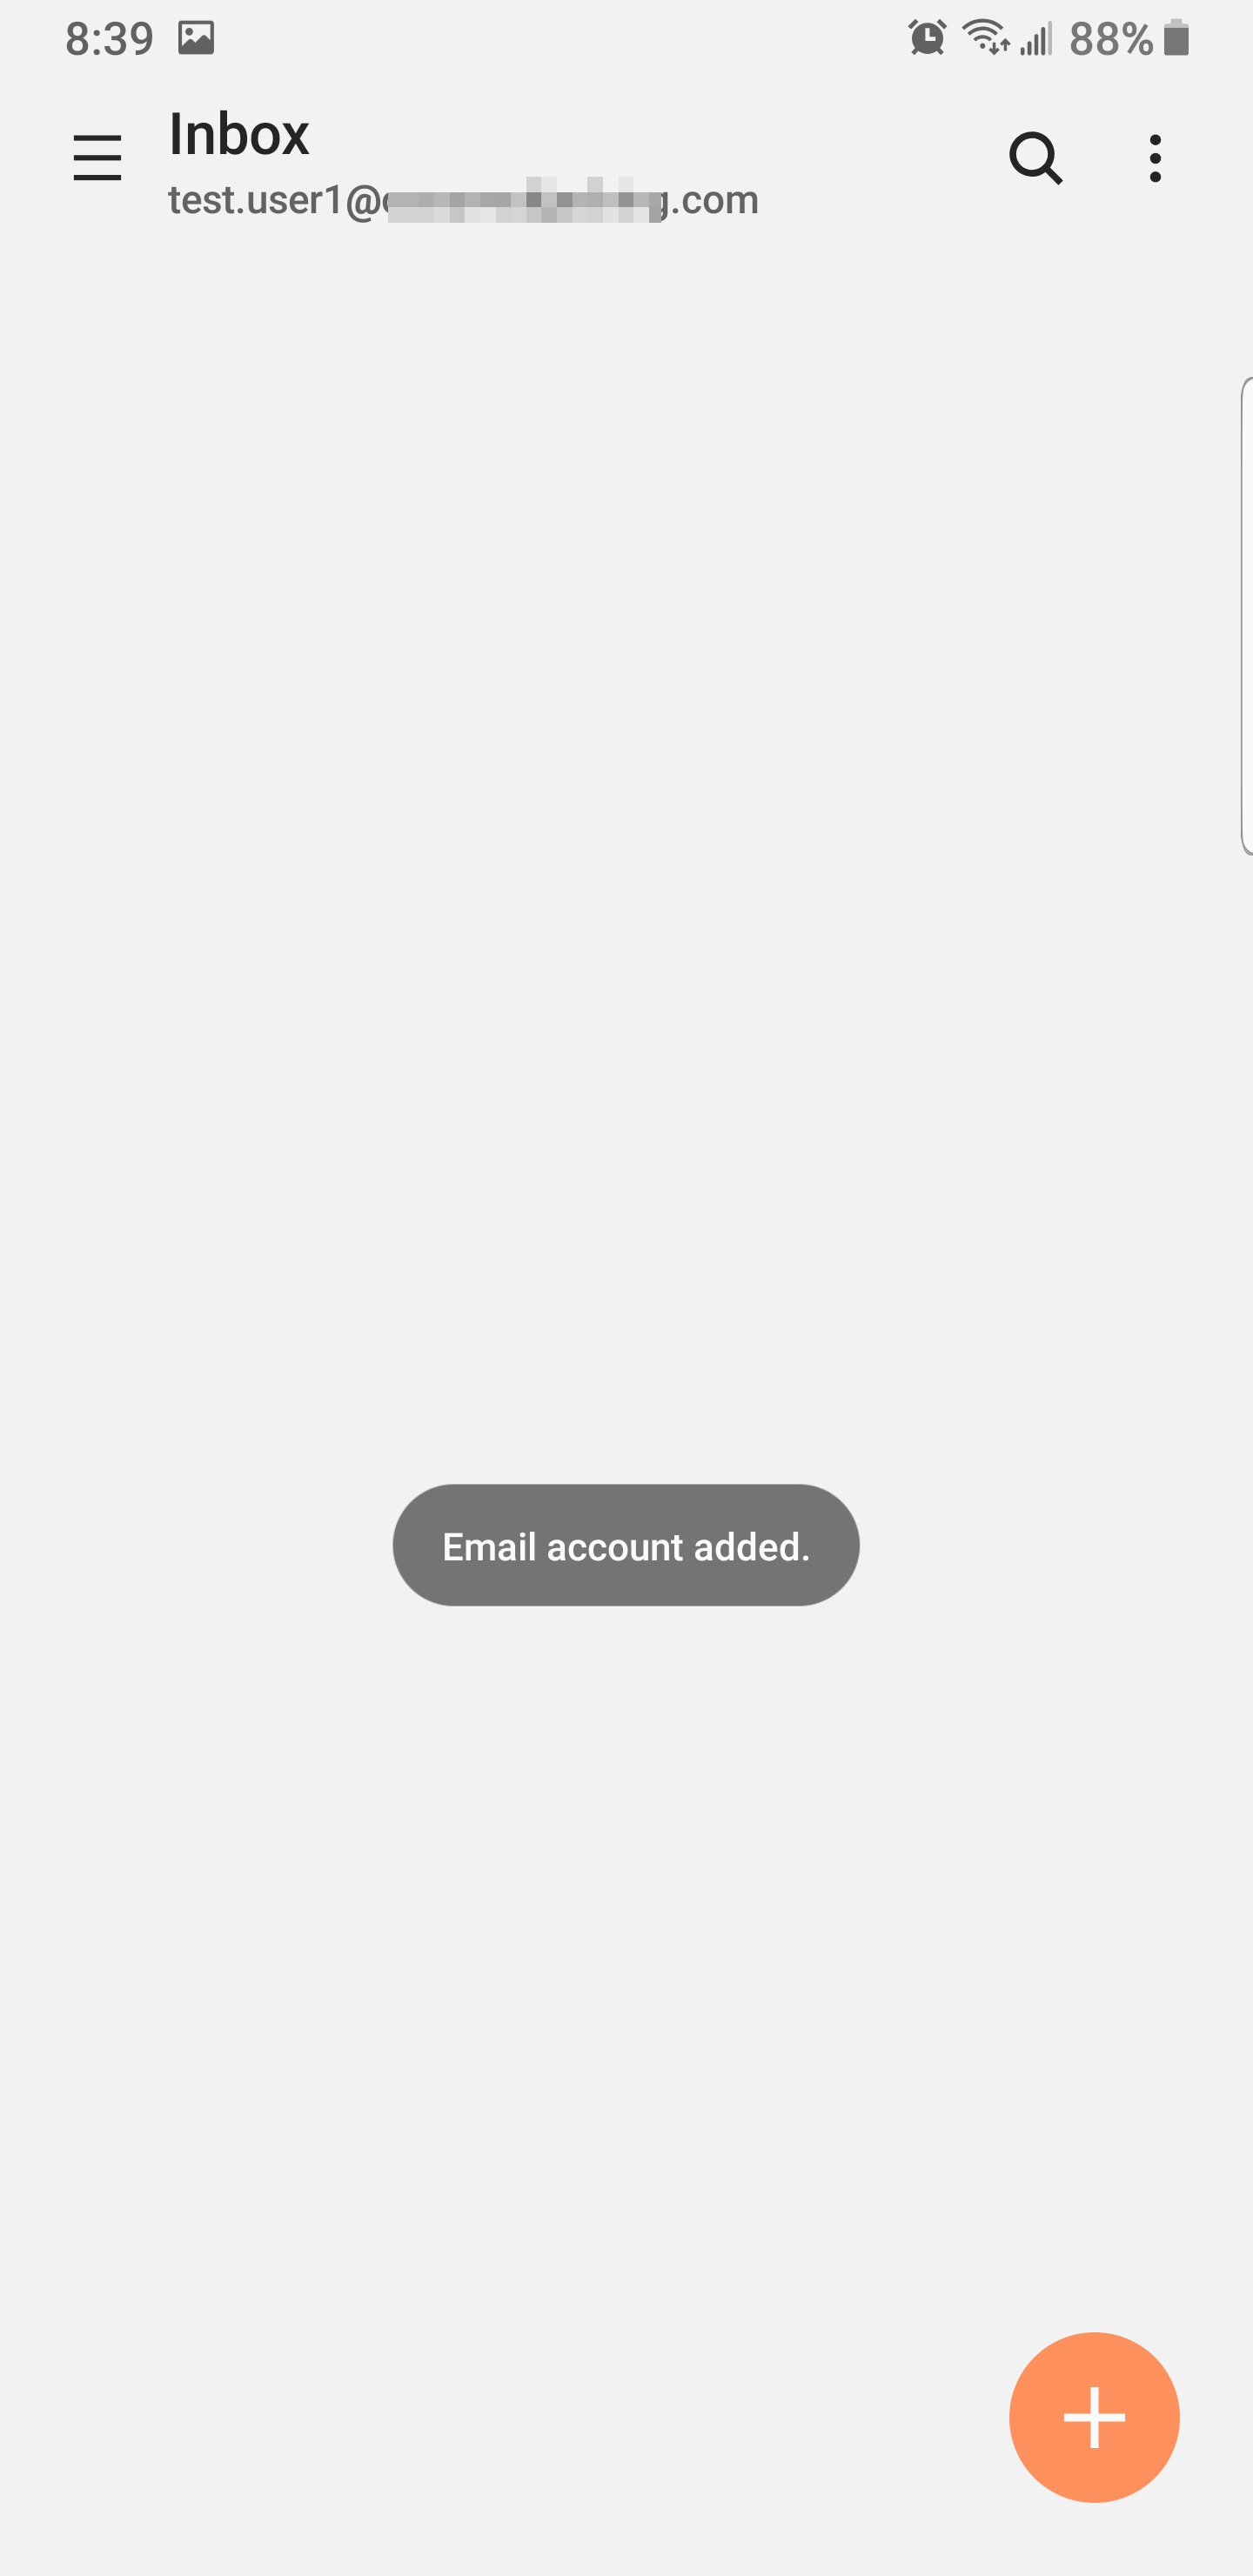 |
1.11 | This will pull up the menu. The mailbox with the check mark beside it is the one you are currently viewing. You can also tap All accounts to see email from all the accounts at once. | 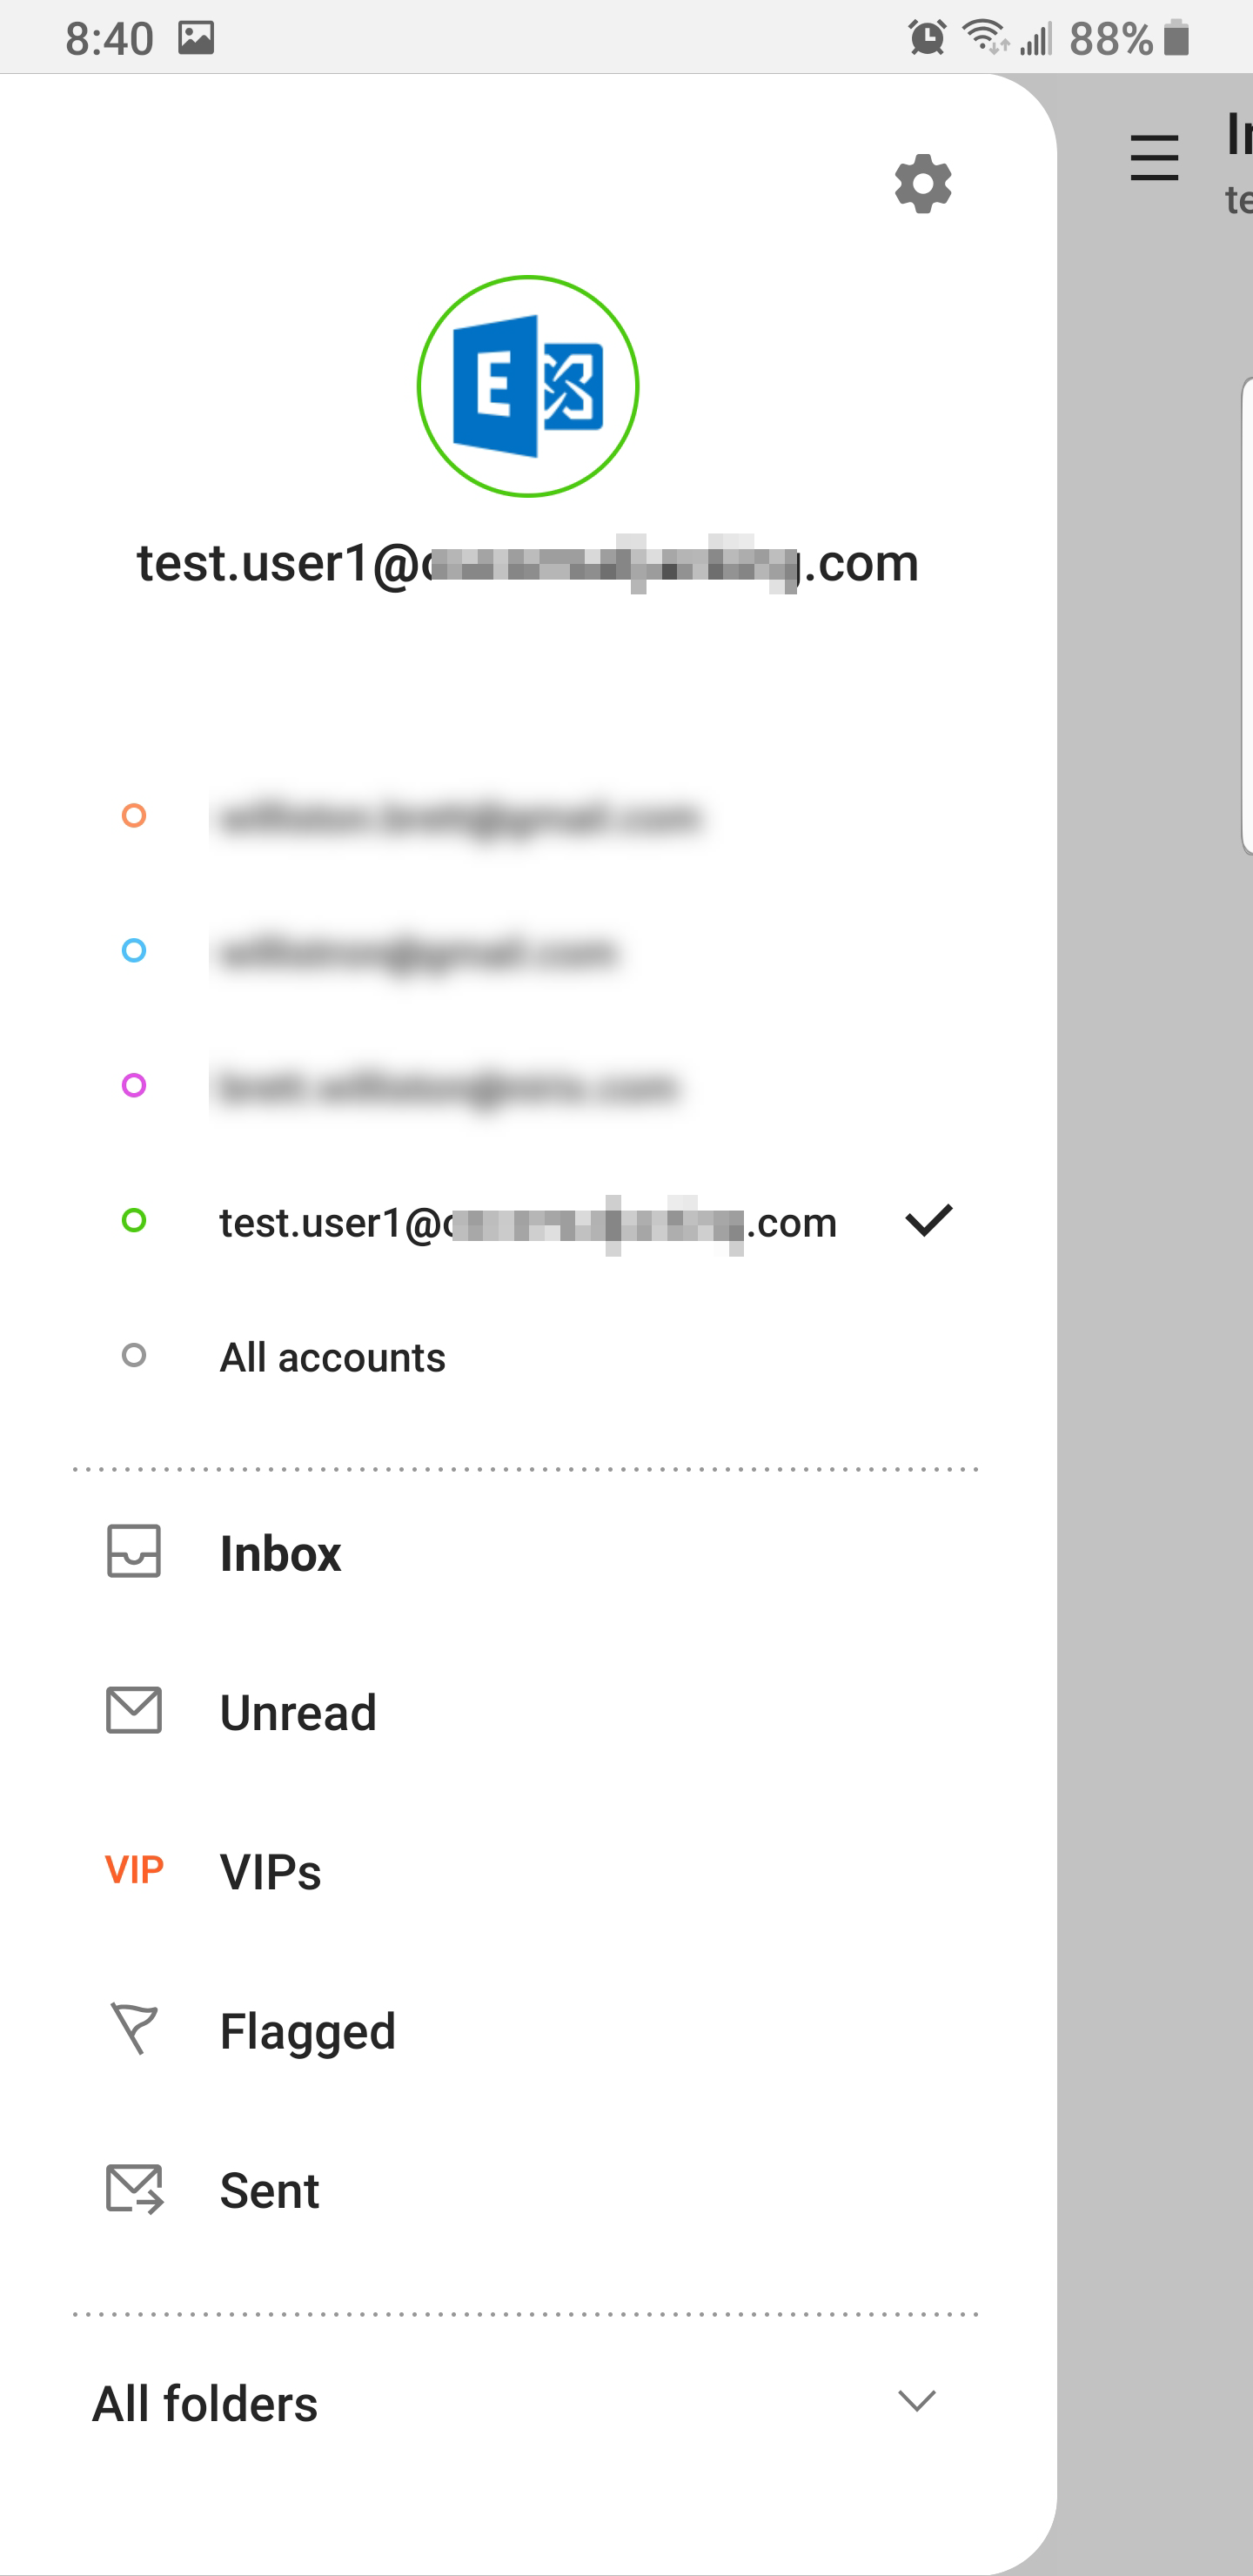 |
Apple Mail App
Sub-Step # | Instruction | Screenshot |
|---|---|---|
2.1 | Tap Settings to open the general iOS settings. |  |
2.2 | After it opens, scroll down to Passwords & Accounts. | 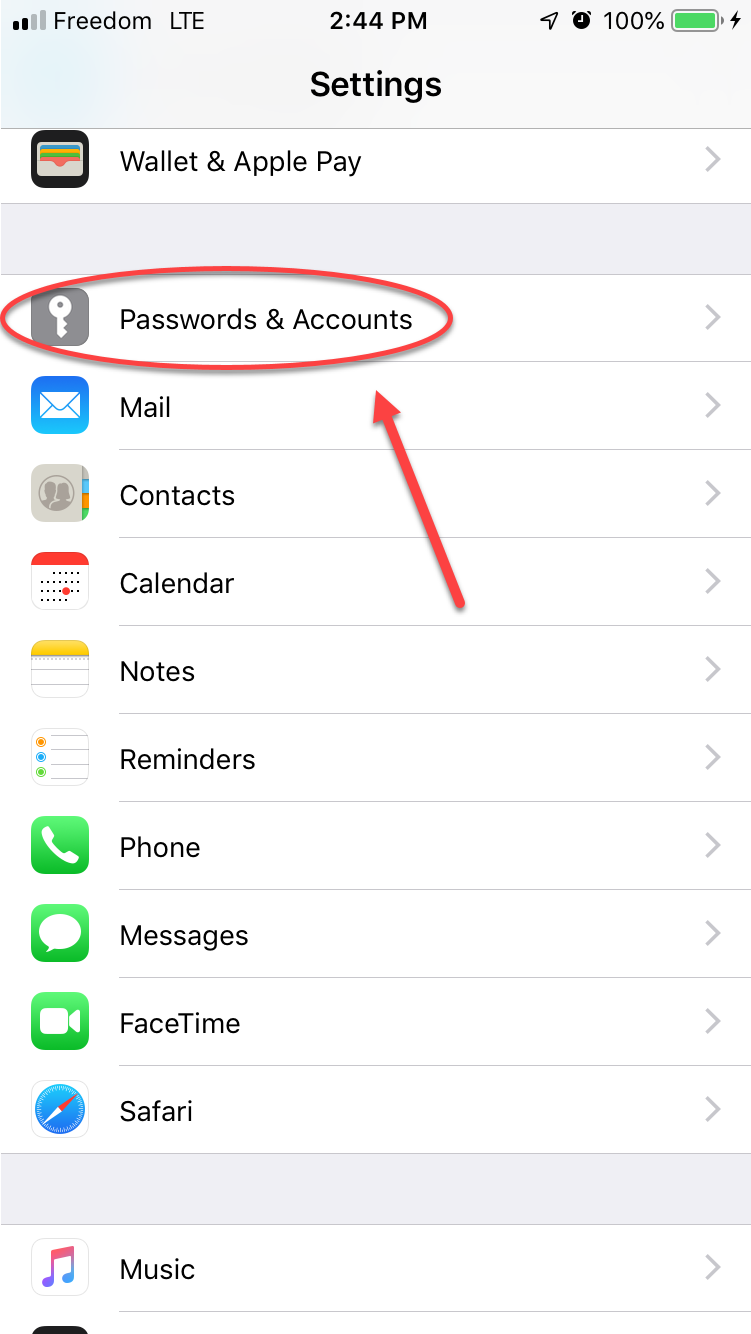 |
2.3 | Afterwards, tap the Exchange logo. | 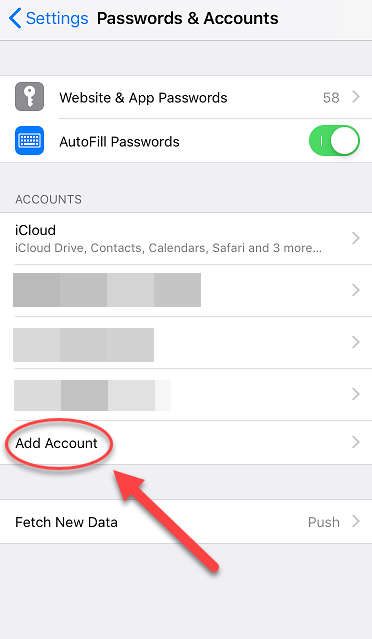 |
2.4 | Type in your email address, and the Description, or label, you’d like use for the Mail app. (See 2.11 to see how the description will appear). | 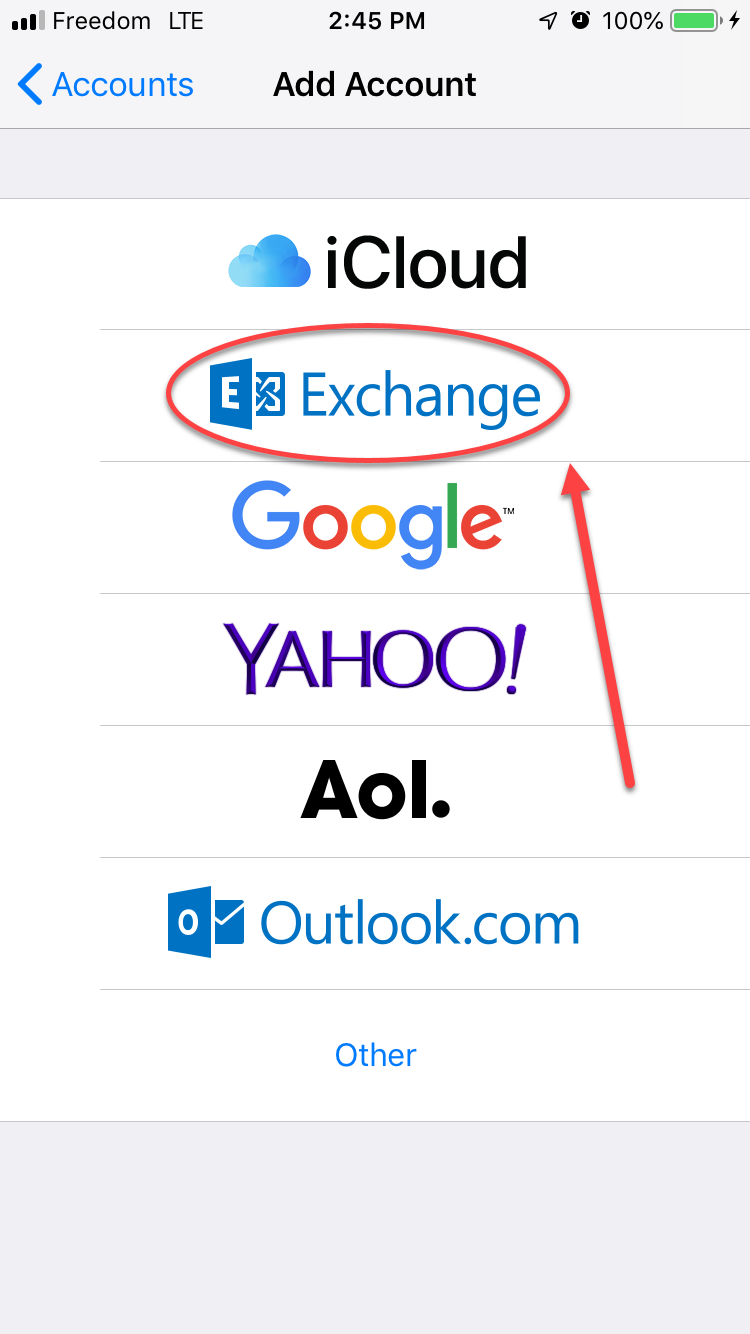 |
2.5 | Type in your email address, and the Description, or label, you’d like use for the Mail app. (See 2.11 to see how the description will appear). |  |
2.6 | iOS will then prompt you with a window; select Configure Manually. | |
2.7 | The screen will now have a Password field, enter the Password, then tap Next. | 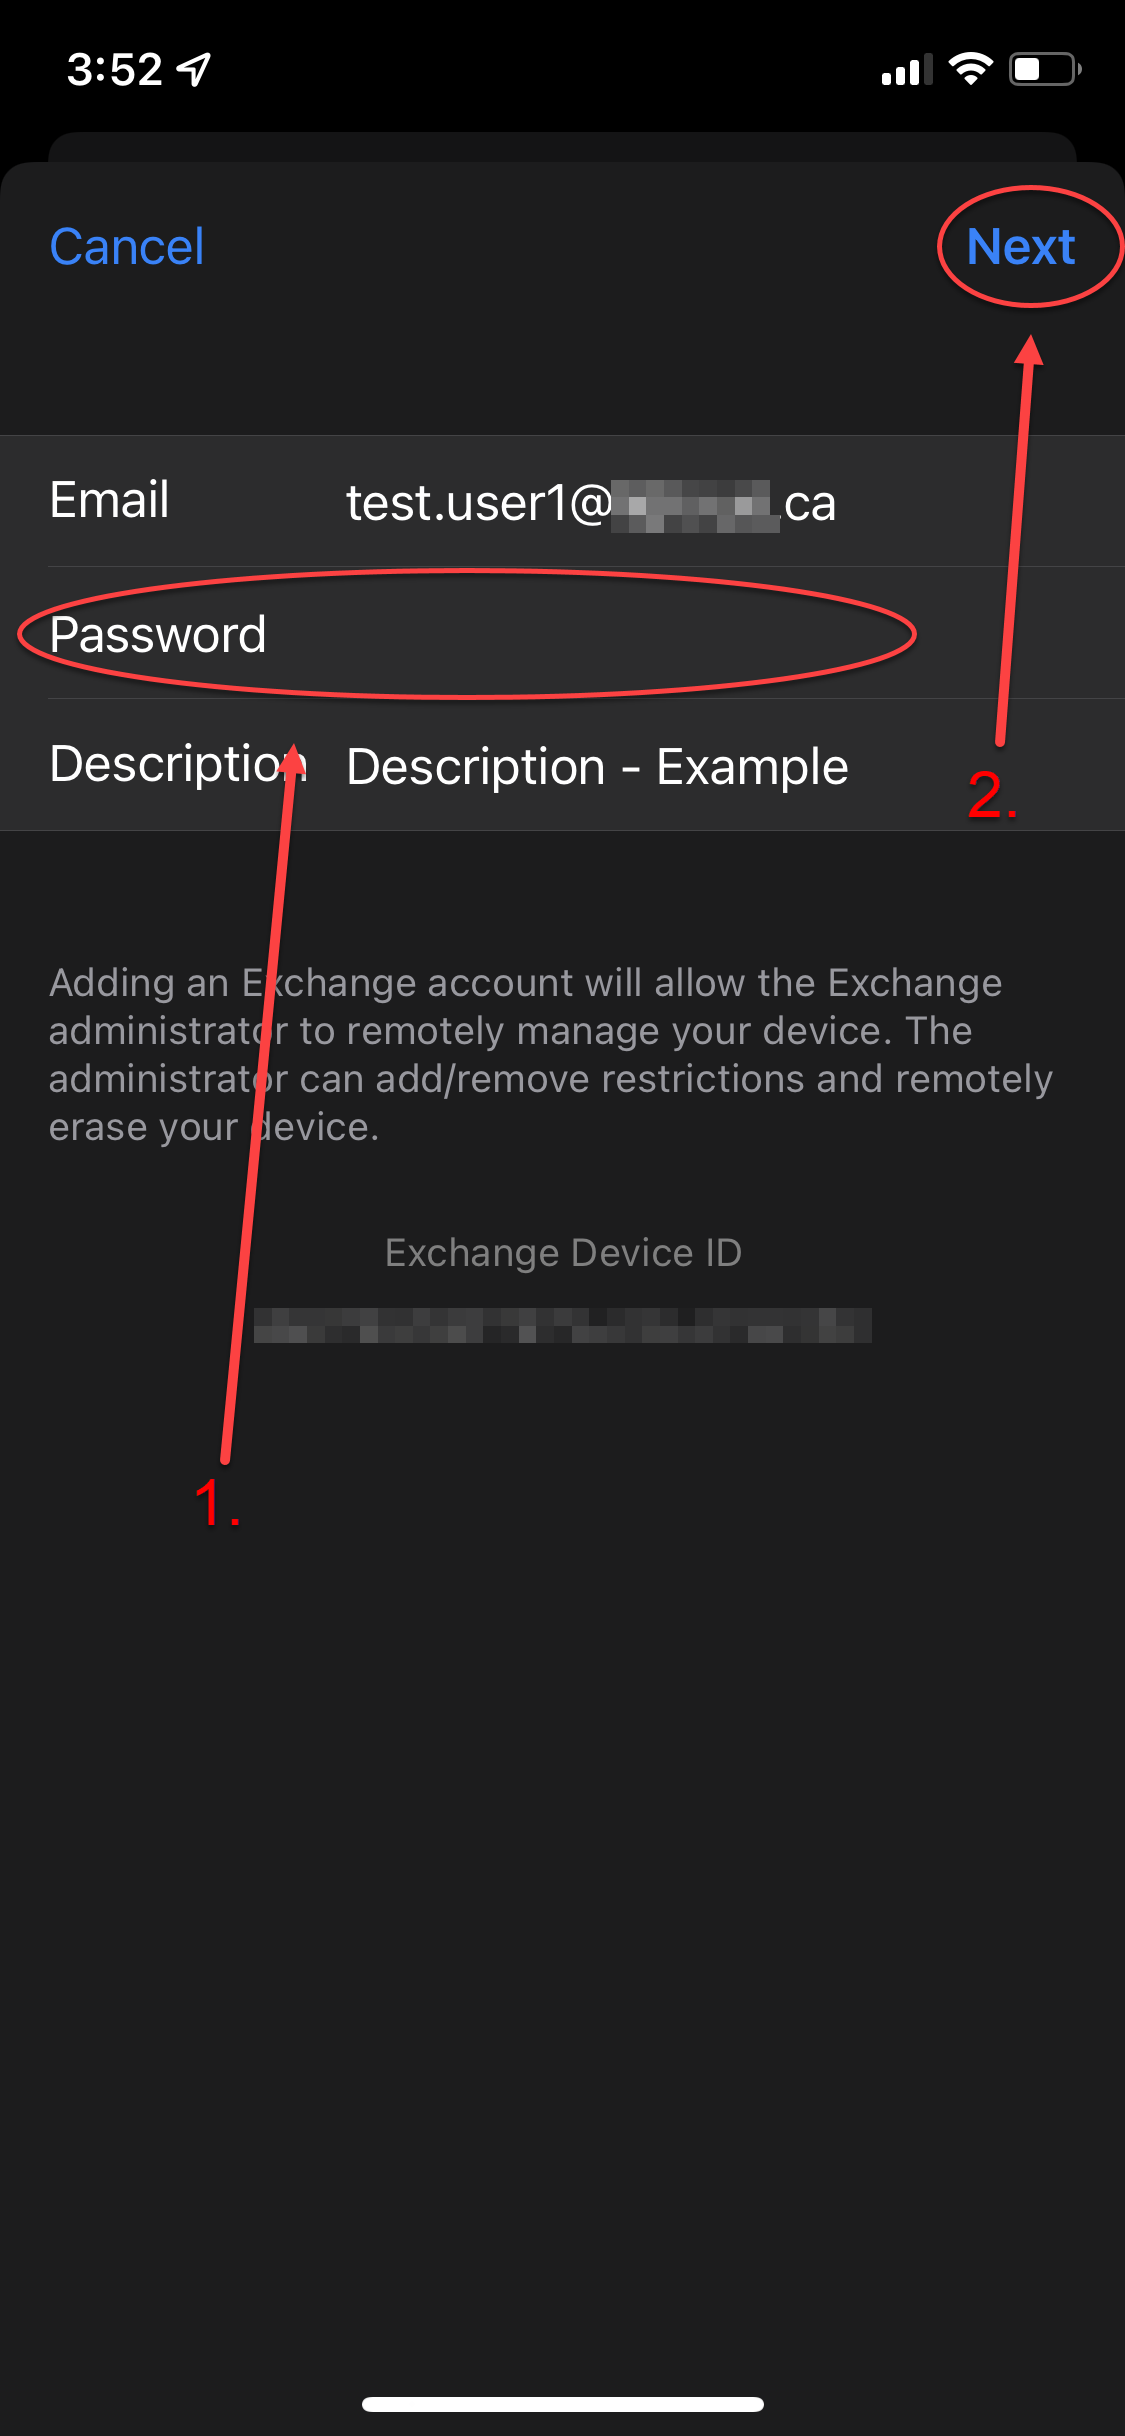 |
2.8 | More fields will now show up, filling them out as follows:
Fill out the new fields, then Next. | 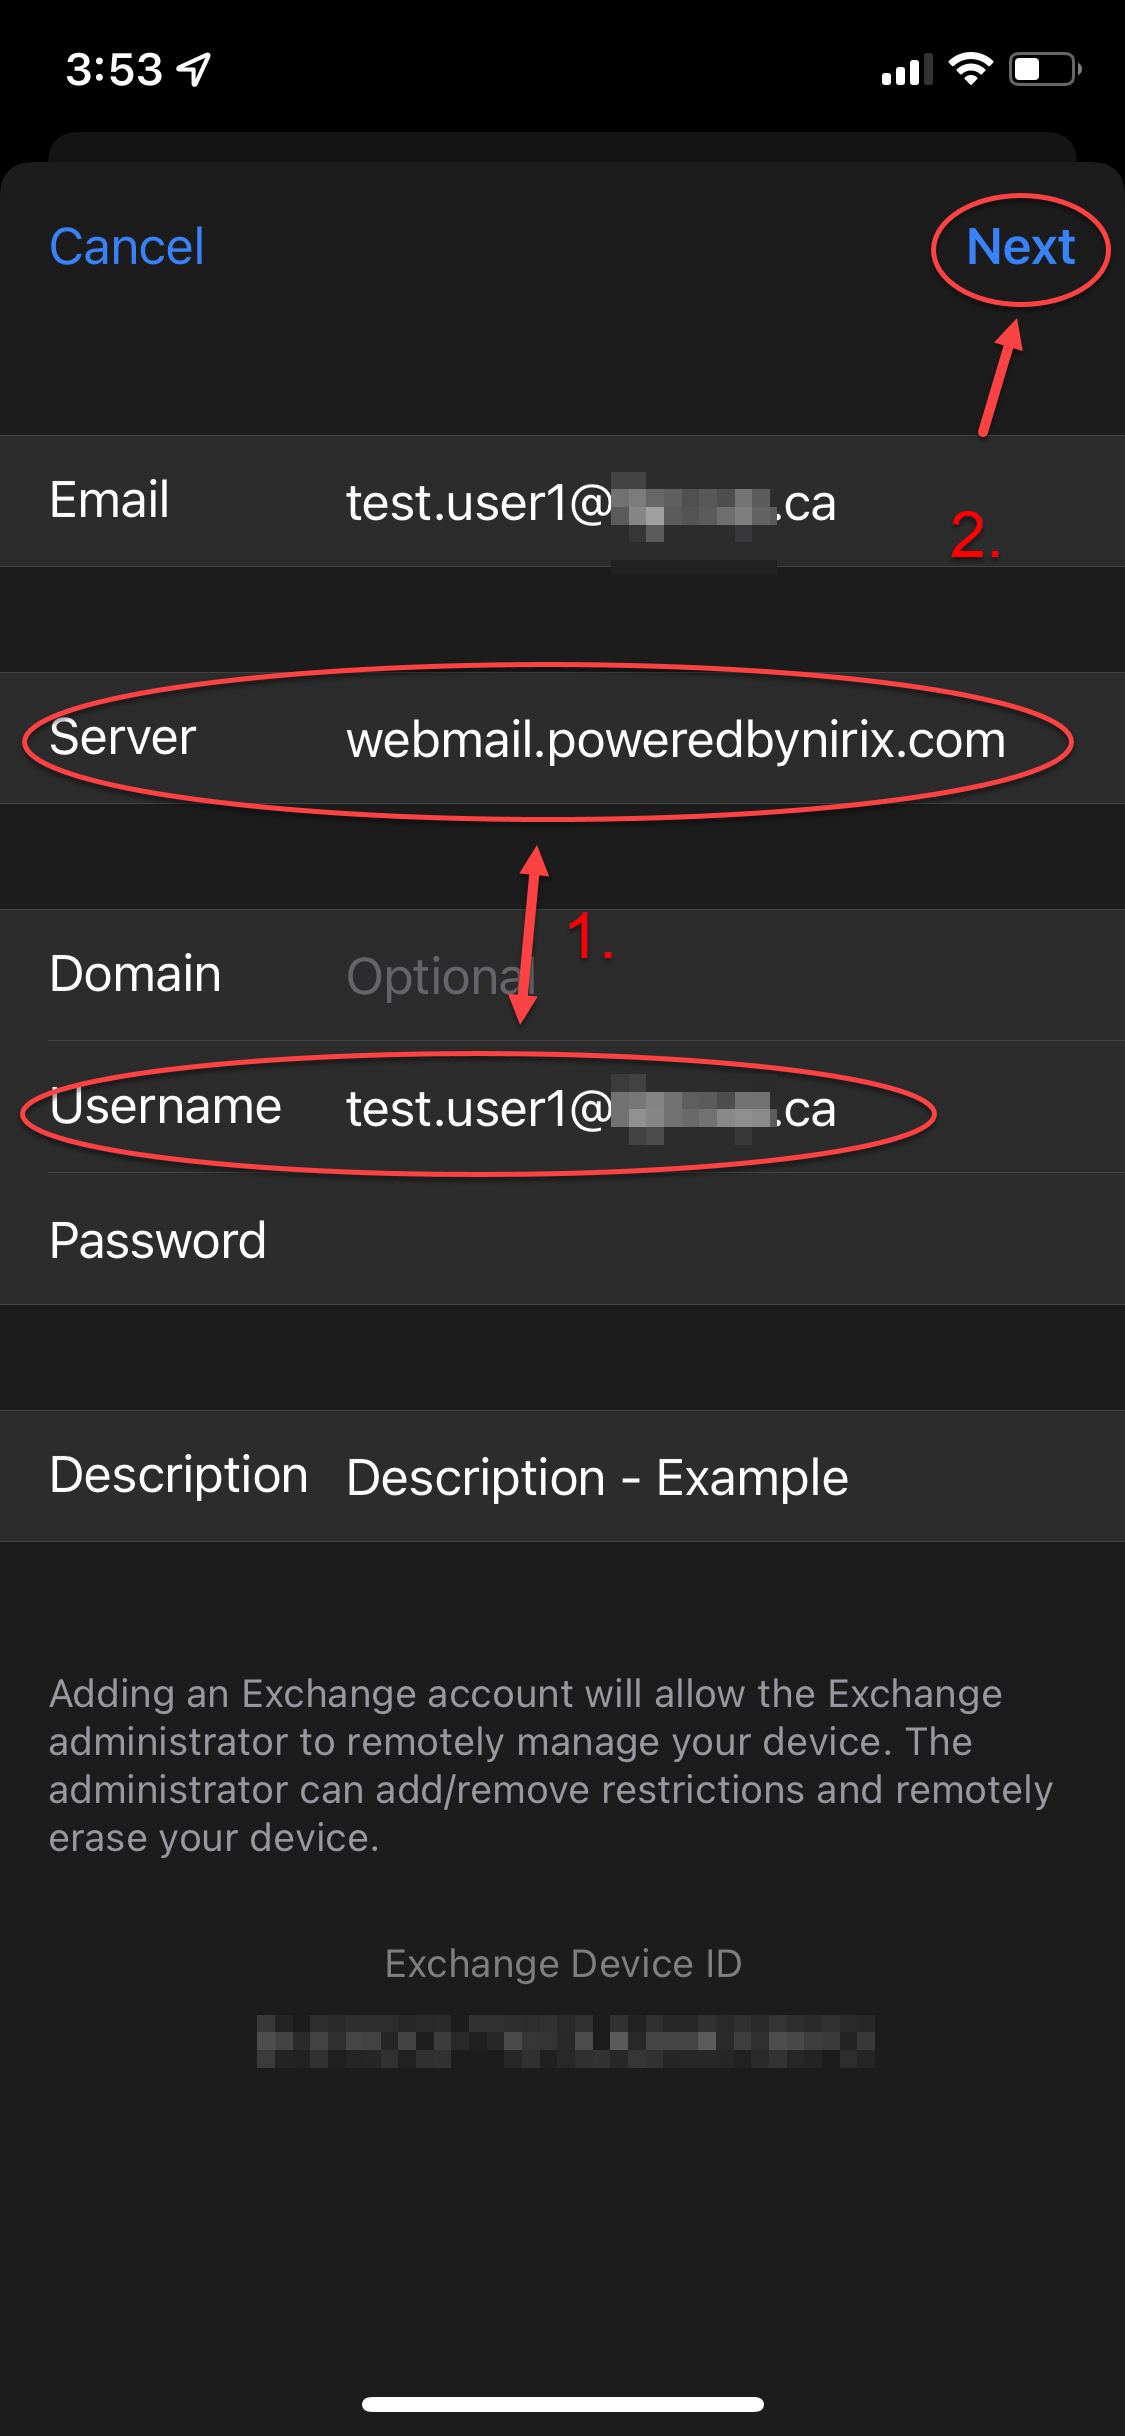 |
2.9 | Decide what you’d like to sync (out of Mail, Contacts, Calendar, Reminders, & Notes) between your Exchange account, and your iOS device, tap Save (It can take a moment for the Inbox to populate with emails). | 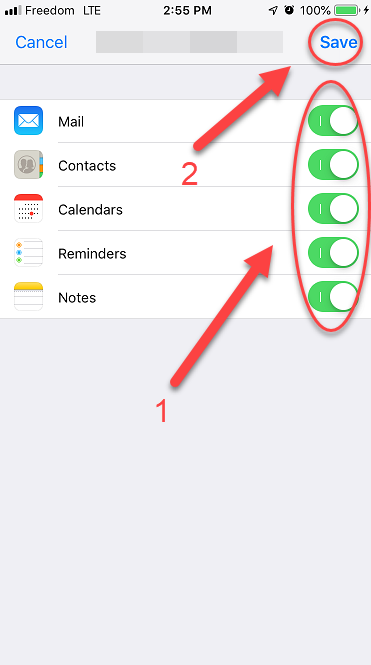 |
2.10 | To view the Exchange email account, open the Mail application, and tap Mailboxes. | 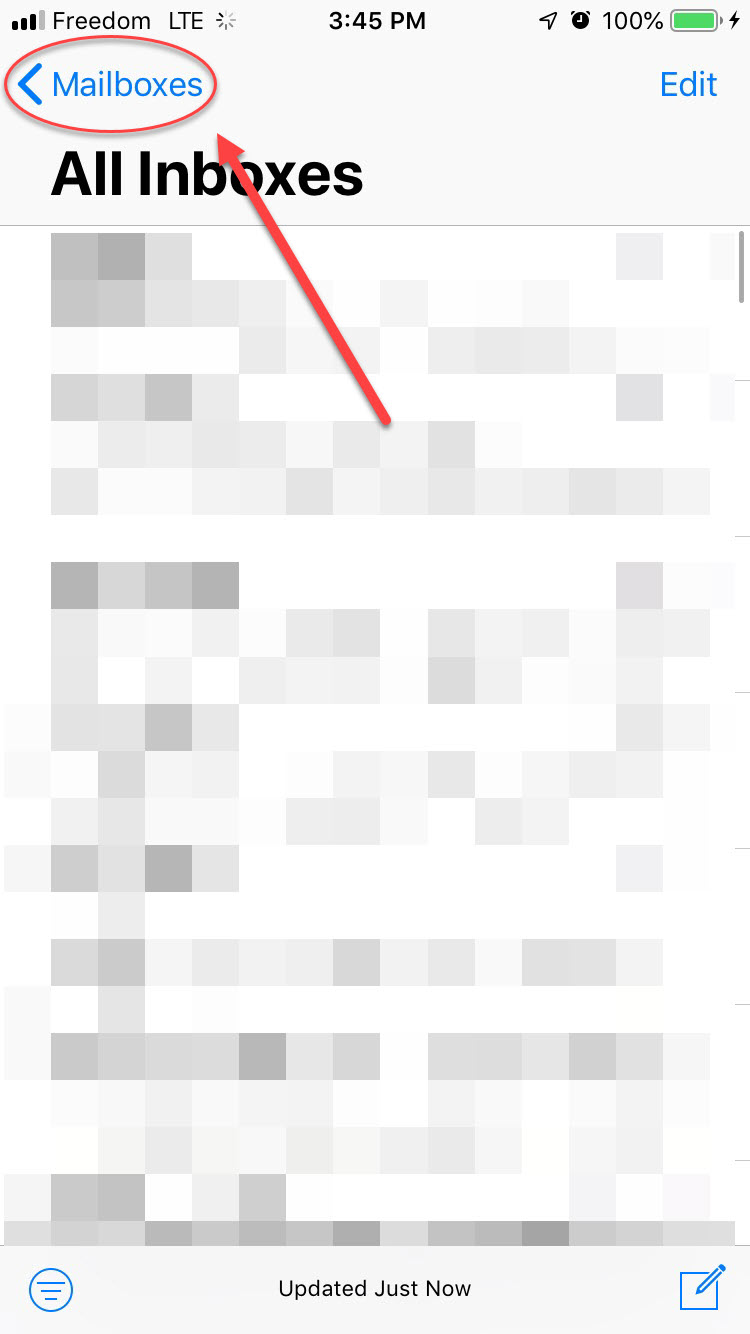 |
2.11 | Then to view all email from every email account on your iOS device (including the newly added email account), tap All Inboxes Alternatively, to view email only from the Exchange email account, tap the respective Description/email account. | 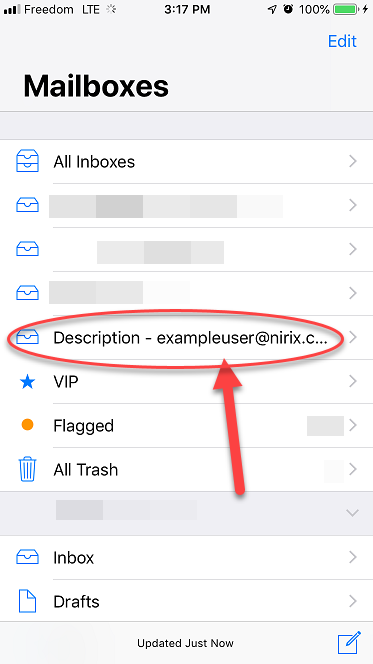 |
Outlook App
Sub-Step # | Instruction | Screenshot |
|---|---|---|
3.1 | Open your Outlook app. If you already have an email account set up, you will have to add a new account through the settings. Tap the account icon on the top left of the app. | 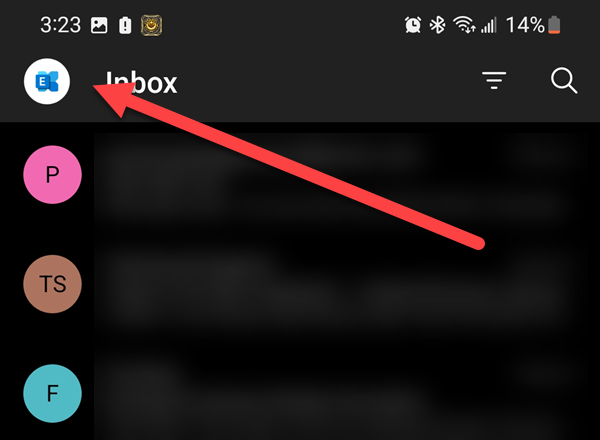 |
3.2 | On the bottom left of the fly-out menu, tap the Gear icon. | 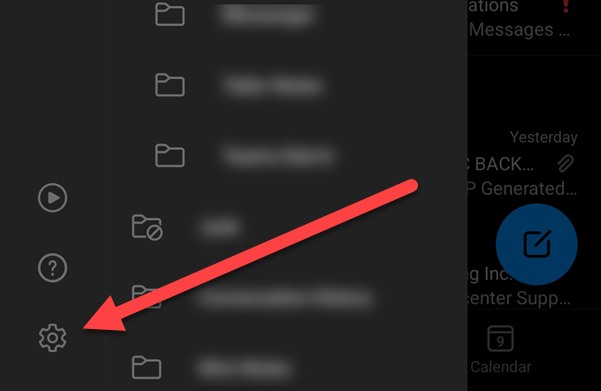 |
3.3 | You will see any accounts you already have added. Tap ADD EMAIL ACCOUNT. | 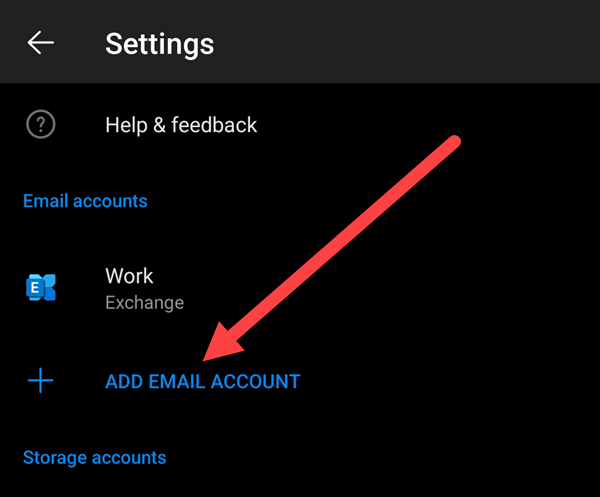 |
3.4 | On the pop up on the bottom, tap Add an email account. | 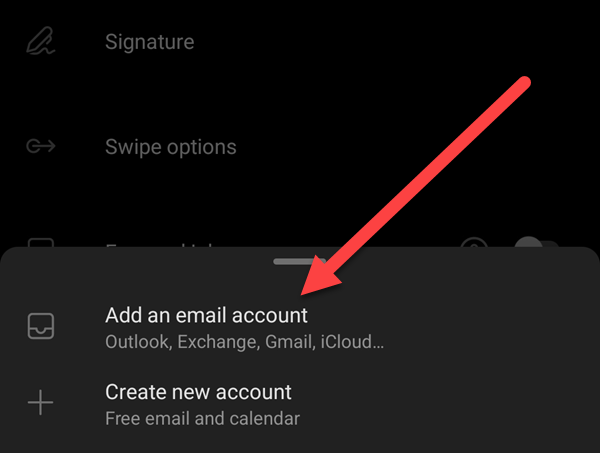 |
3.5 | Outlook will try to find email addresses already set up in other applications. We will ignore those. If it doesn’t see any accounts and are asked to enter your email address, skip to step 3.7. | 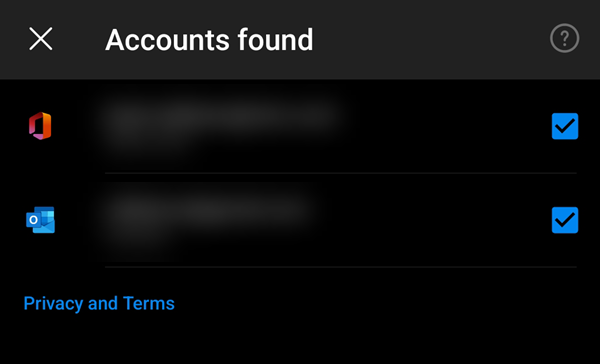 |
3.6 | Look to the bottom of this screen, and tap SKIP THESE ACCOUNTS. |  |
3.7 | Enter your email address where asked. | 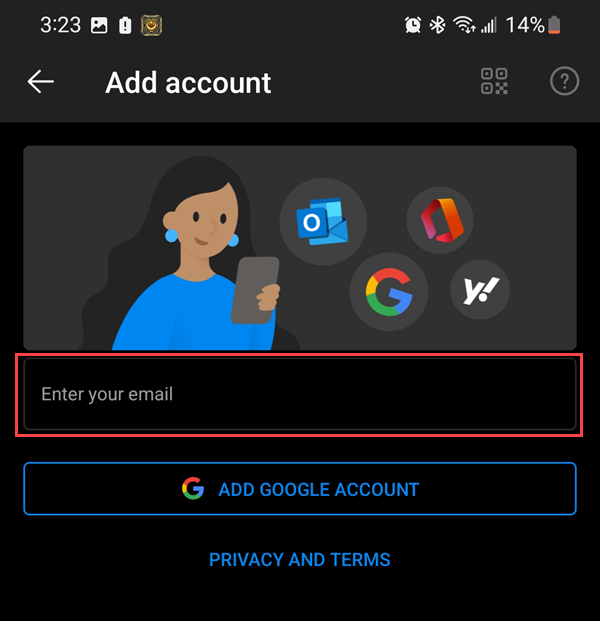 |
3.8 | Once you have entered it, tap Continue at the bottom of the screen.  |  |
3.9 | If you are presented with the Choose Account Type screen, you can move to step 3.11. If it shows Connect IMAP, on Android, click the question mark on the top right. On iPhone, you would tap Not IMAP. |  |
3.10 | At the bottom of the screen, tap Change account provider. | 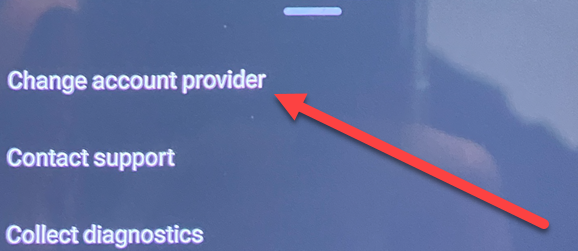 |
3.11 | On the Choose account typescreen, tap Exchange. | 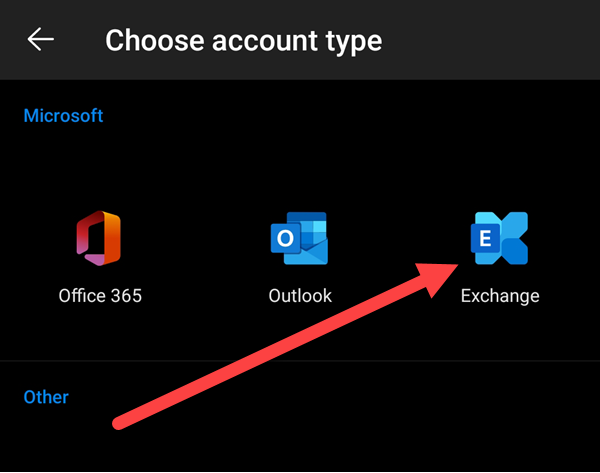 |
3. |
12 | Your email address should already be entered. Enter the following information: Server: webmail.poweredbynirix.com Domain\Username: Your email address again. If that doesn’t work, you may have to use your User Name found in oCCP. IE: nirixhosted\test.user1_ABC Password: Your NIRIX services password. Description: A identifying description of this account. IE: Work or Business Once done, click the Check Mark on the top right. 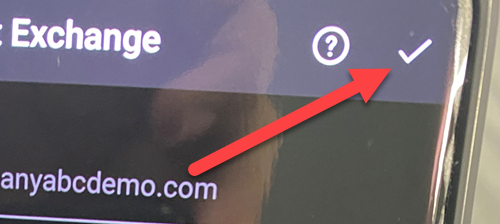 Note: Make sure there are no trailing spaces after your email address or the server name If setting up the Outlook app on an Apple/iOS device, the only difference is that the ‘Domain’ field can be left blank, and the ‘Username’ is your email address (everything else as above is the same). | 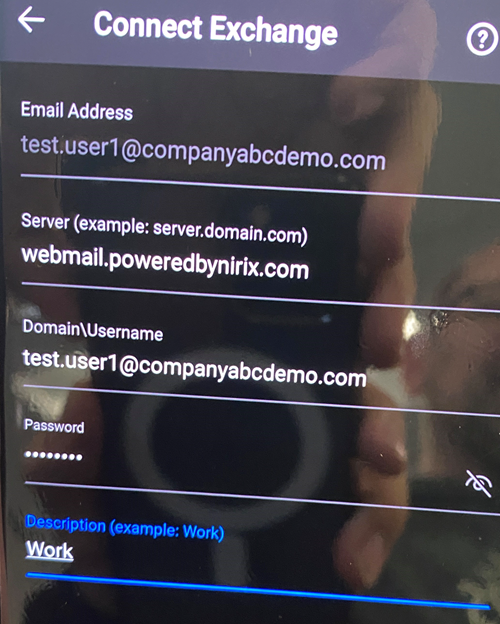 |
3. |
13 | Your account should be added! | 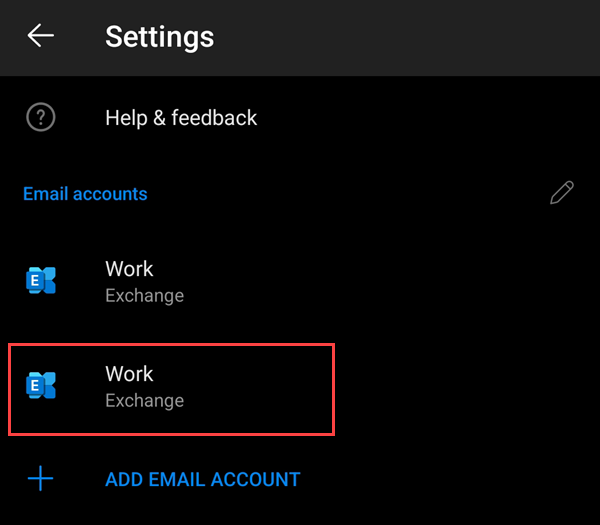 |
Gmail App
Sub-Step # | Instruction | Screenshot |
|---|---|---|
3.1 | Open your Gmail app. Tap the side bar icon on the top left of the screen. | 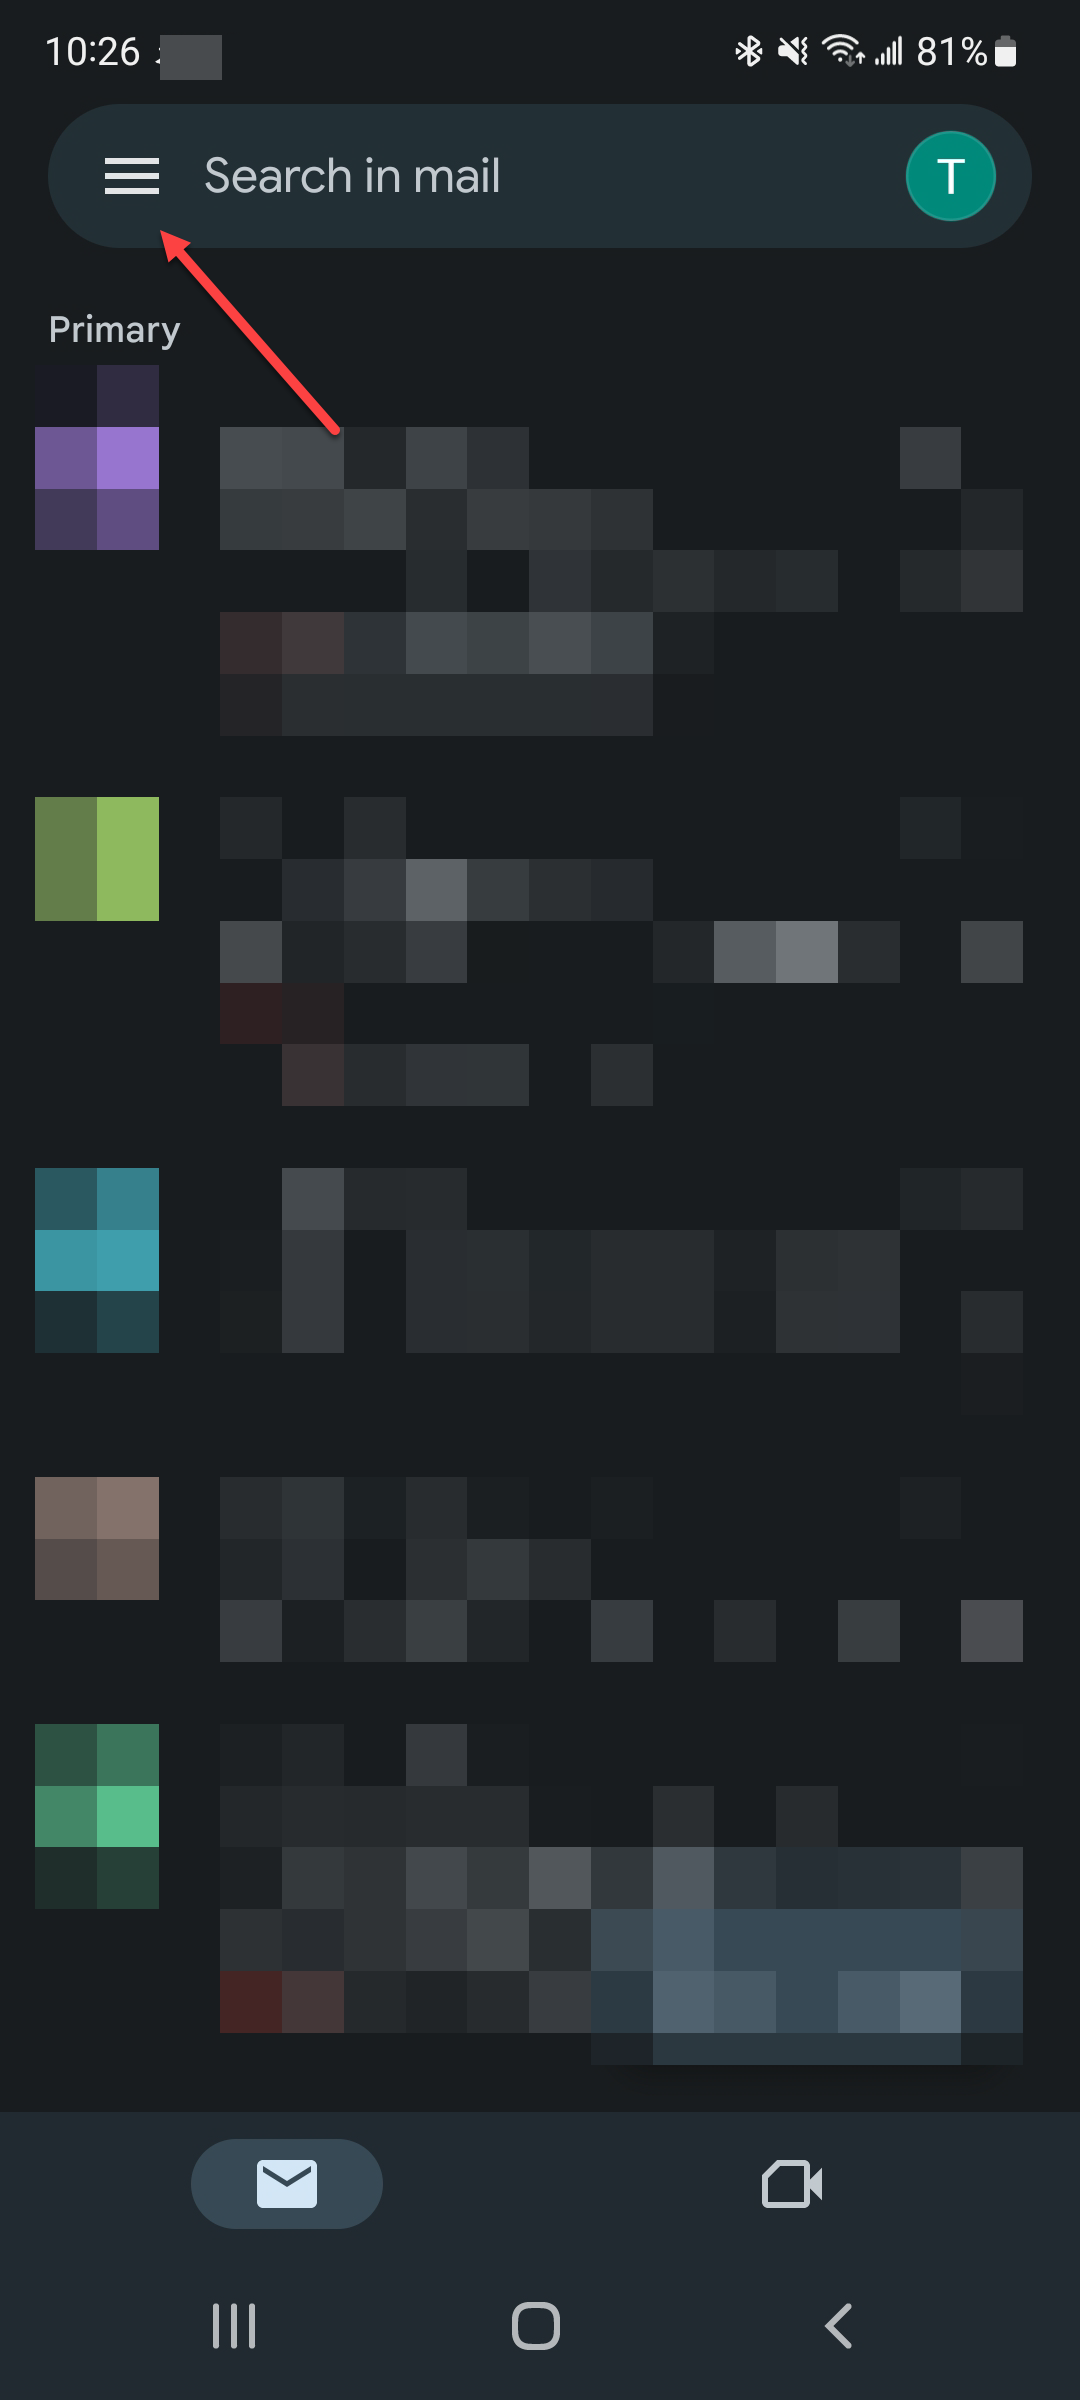 |
Scroll to the bottom, tap Settings | 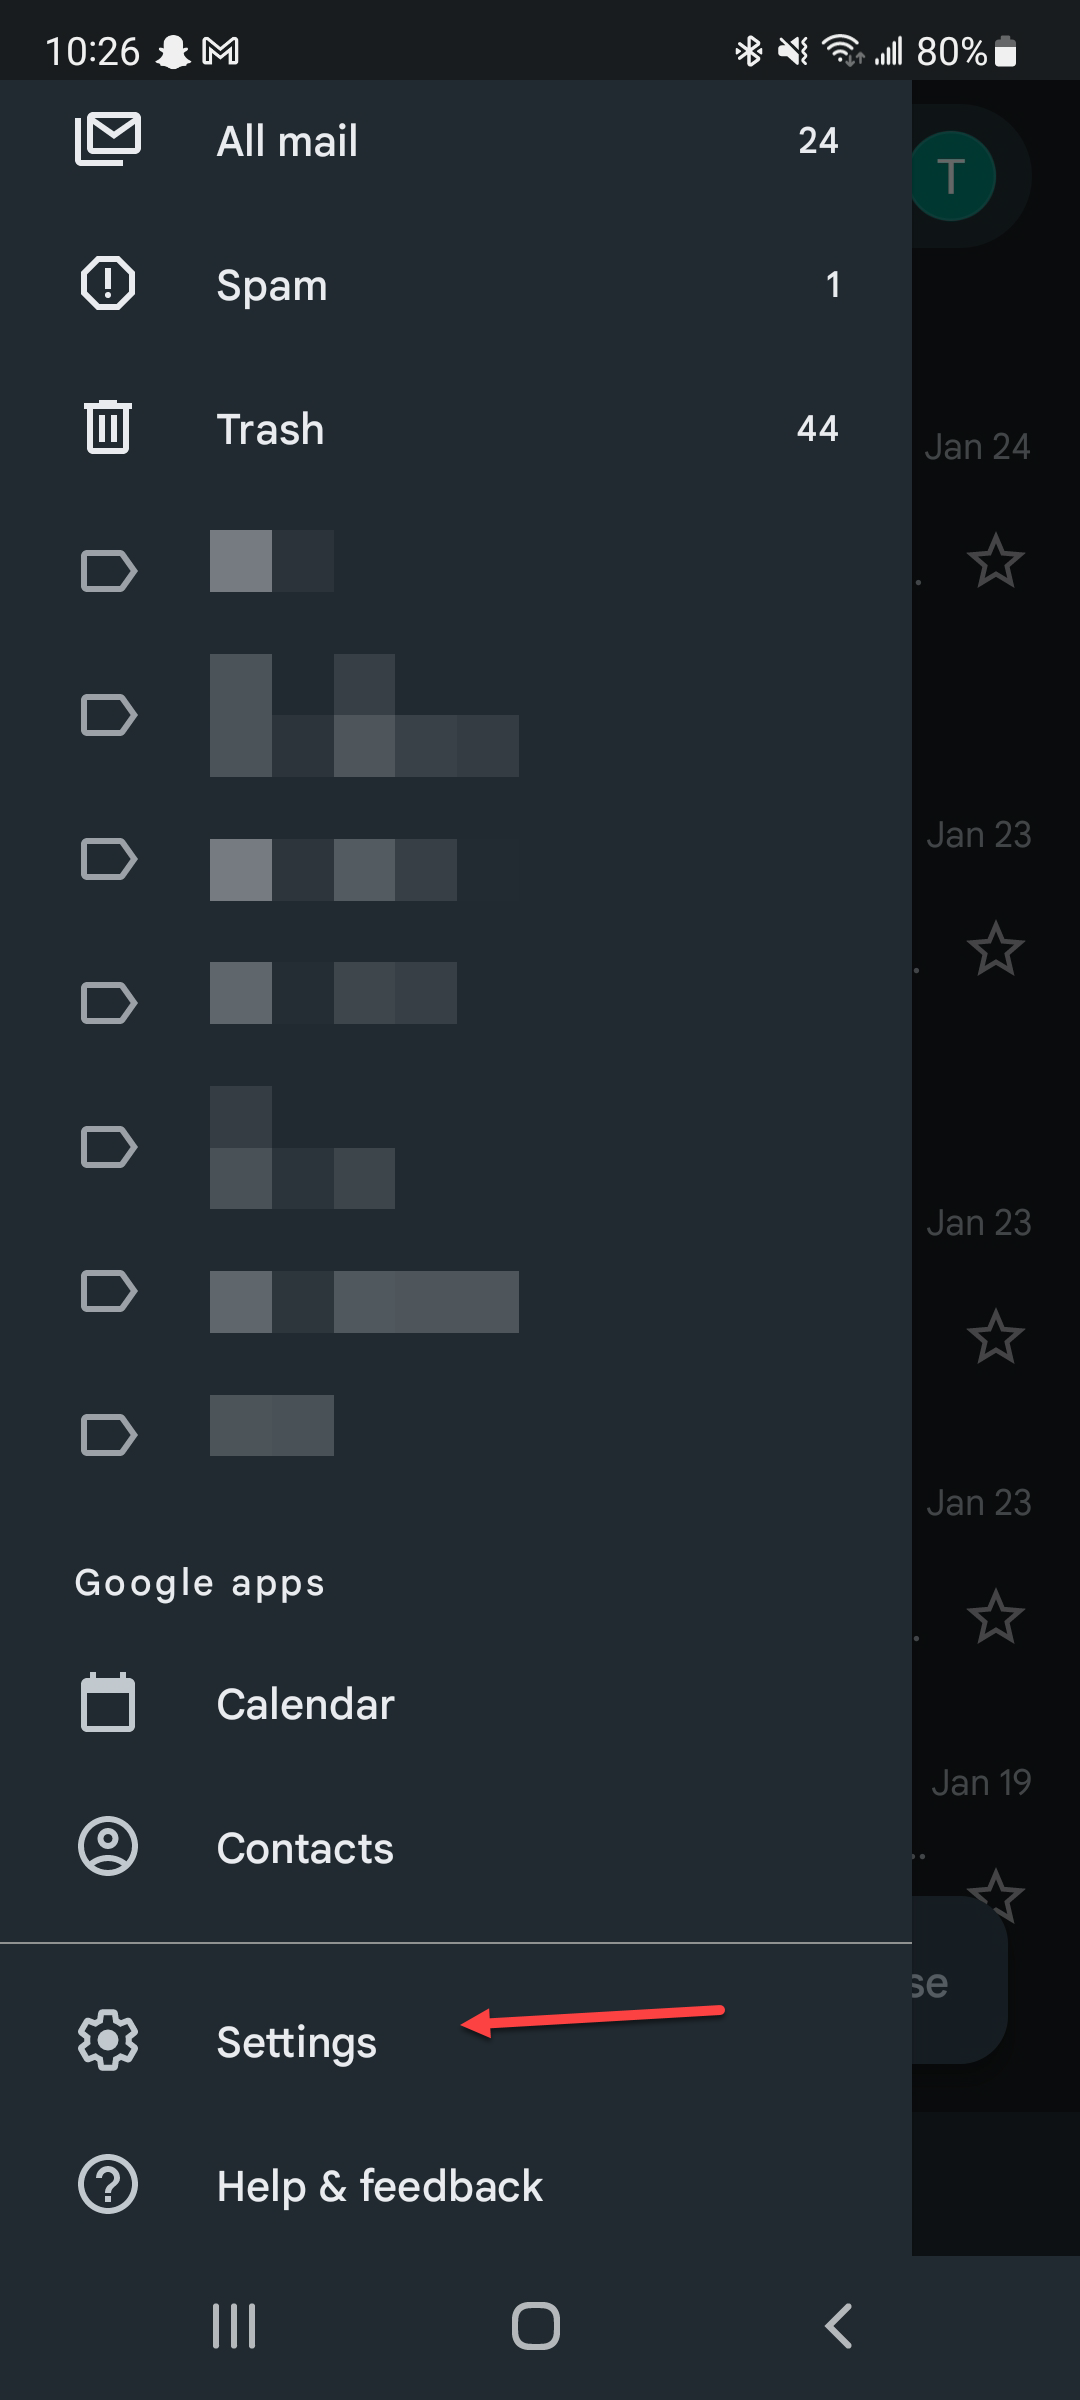 | |
Tap Add Account | 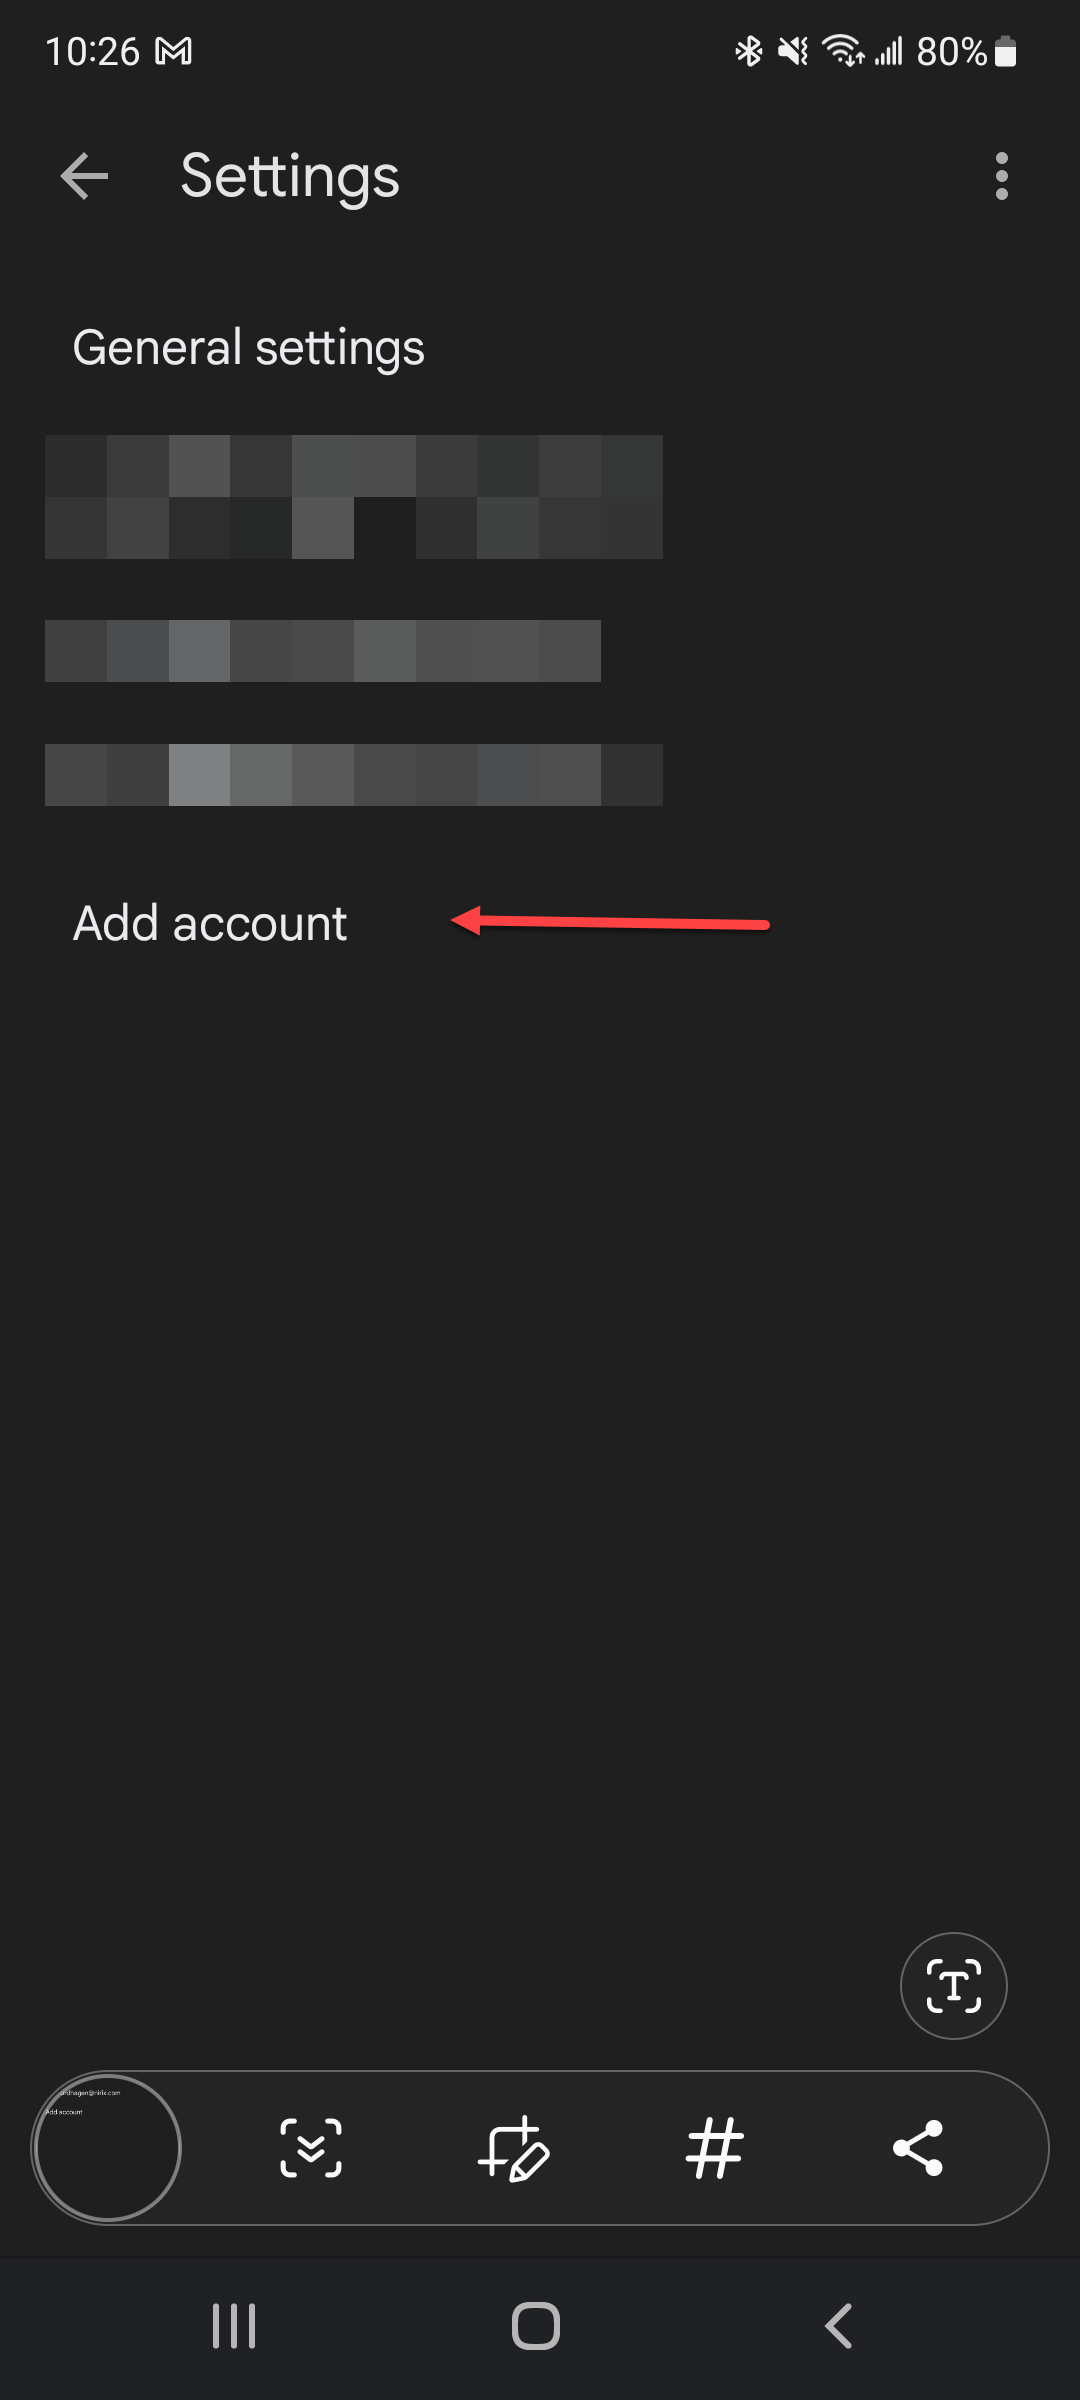 | |
Tap Exchange and Office 365 | 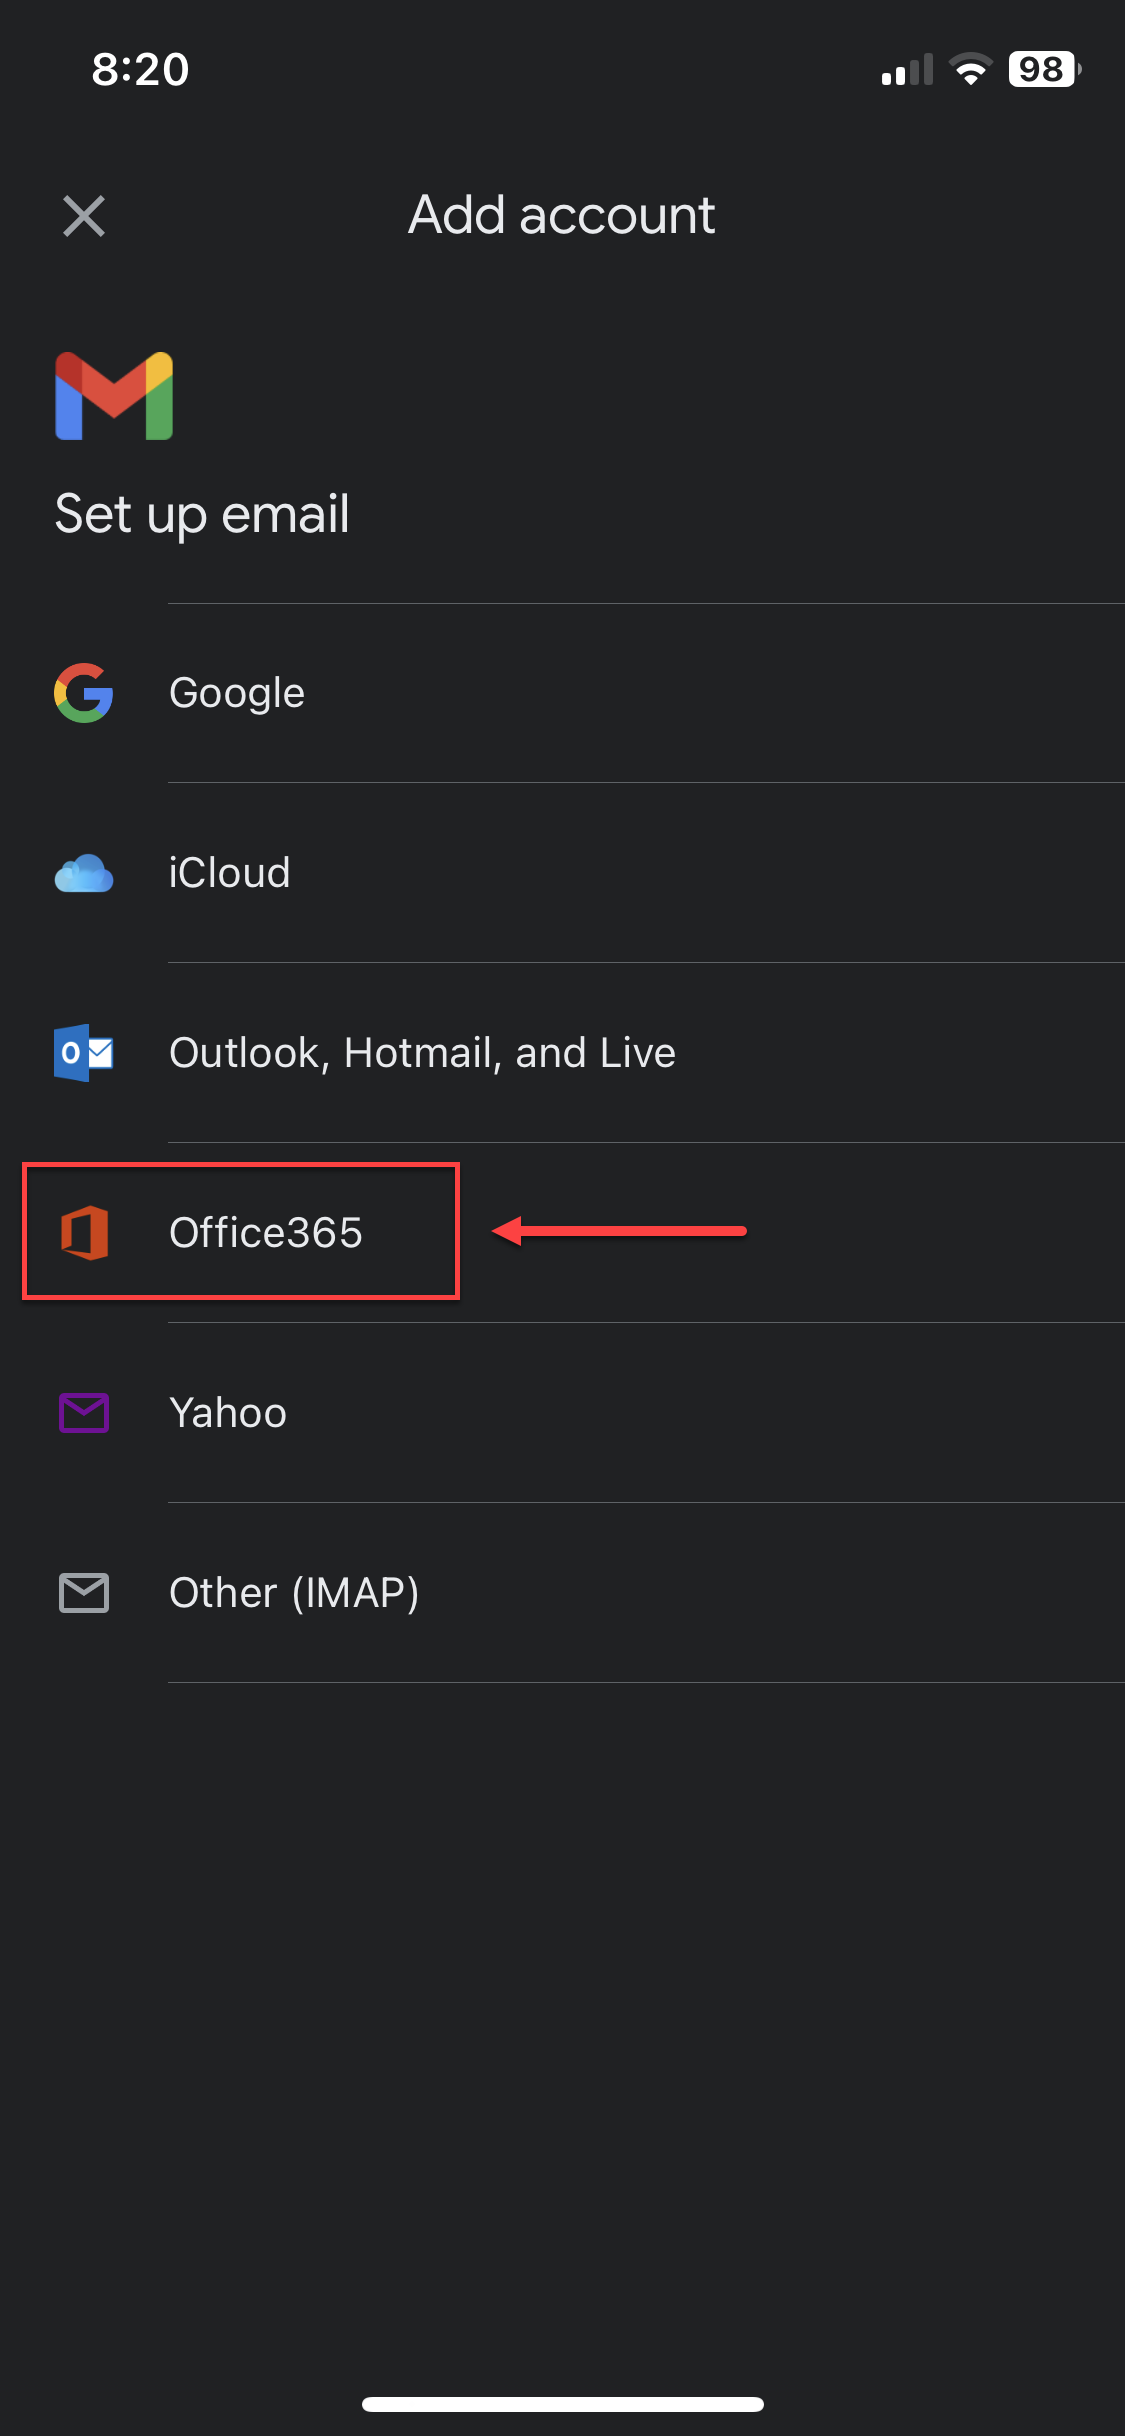 | |
Enter email and address and password. In Server enter webmail.poweredbynirix.com; you’ll have to do this twice for both ‘Incoming’ and ‘Outgoing’ server settings. You can leave the other settings as is. | 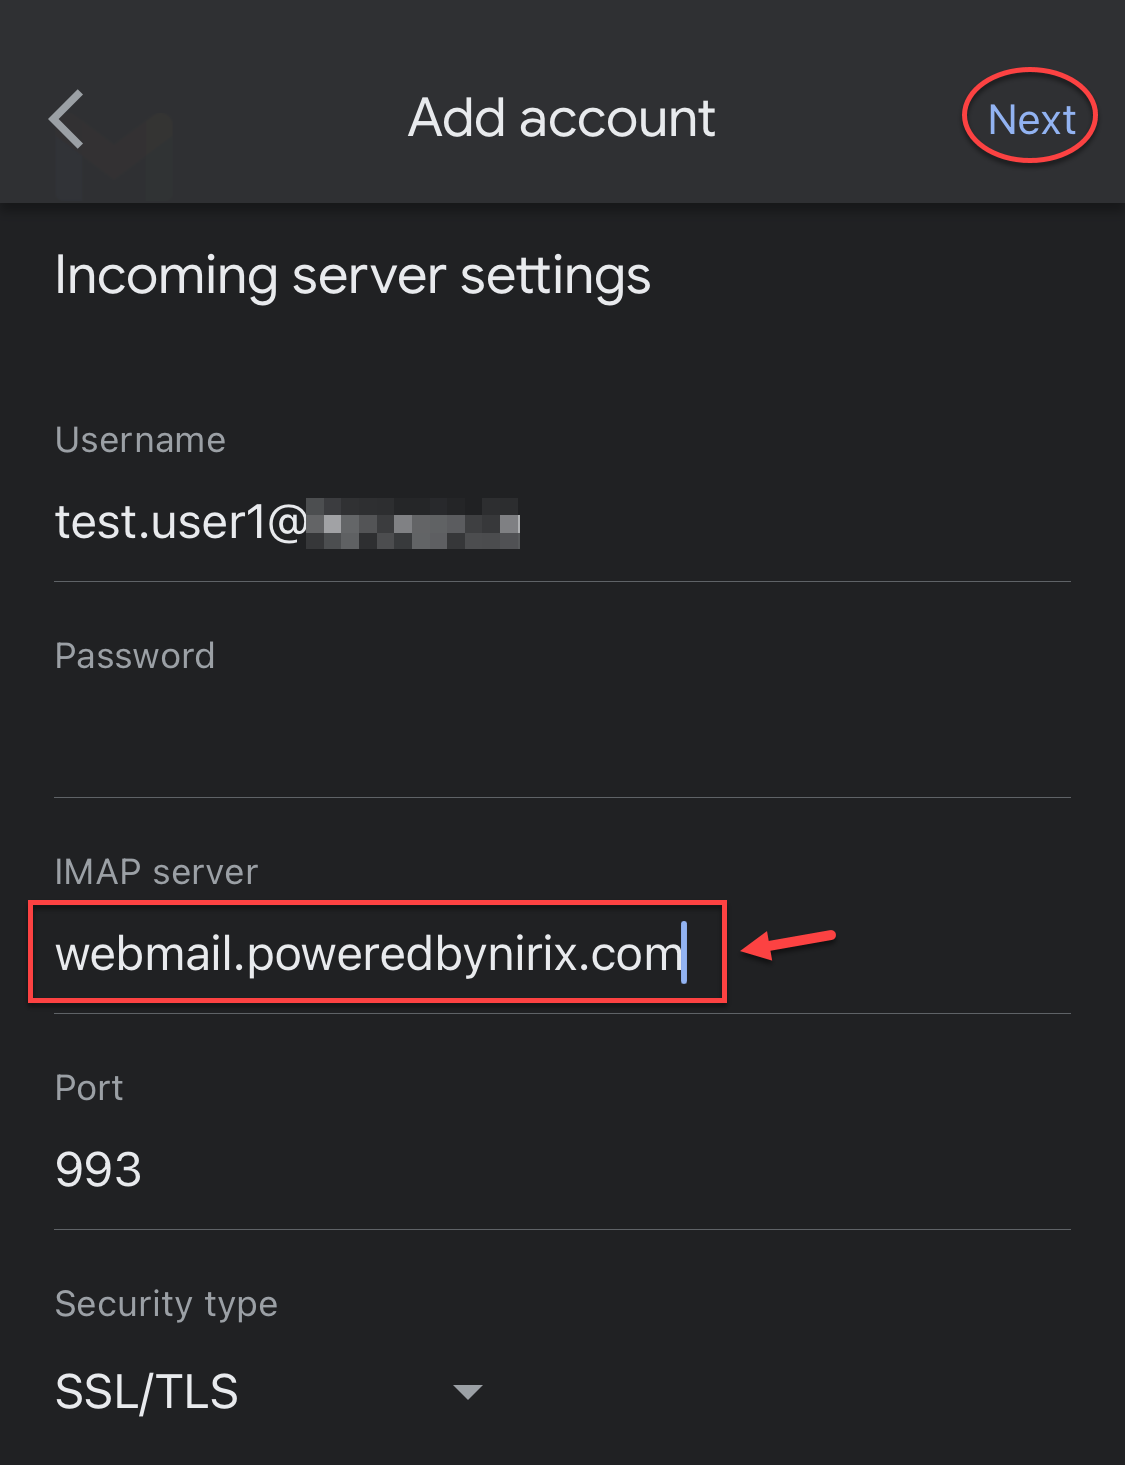 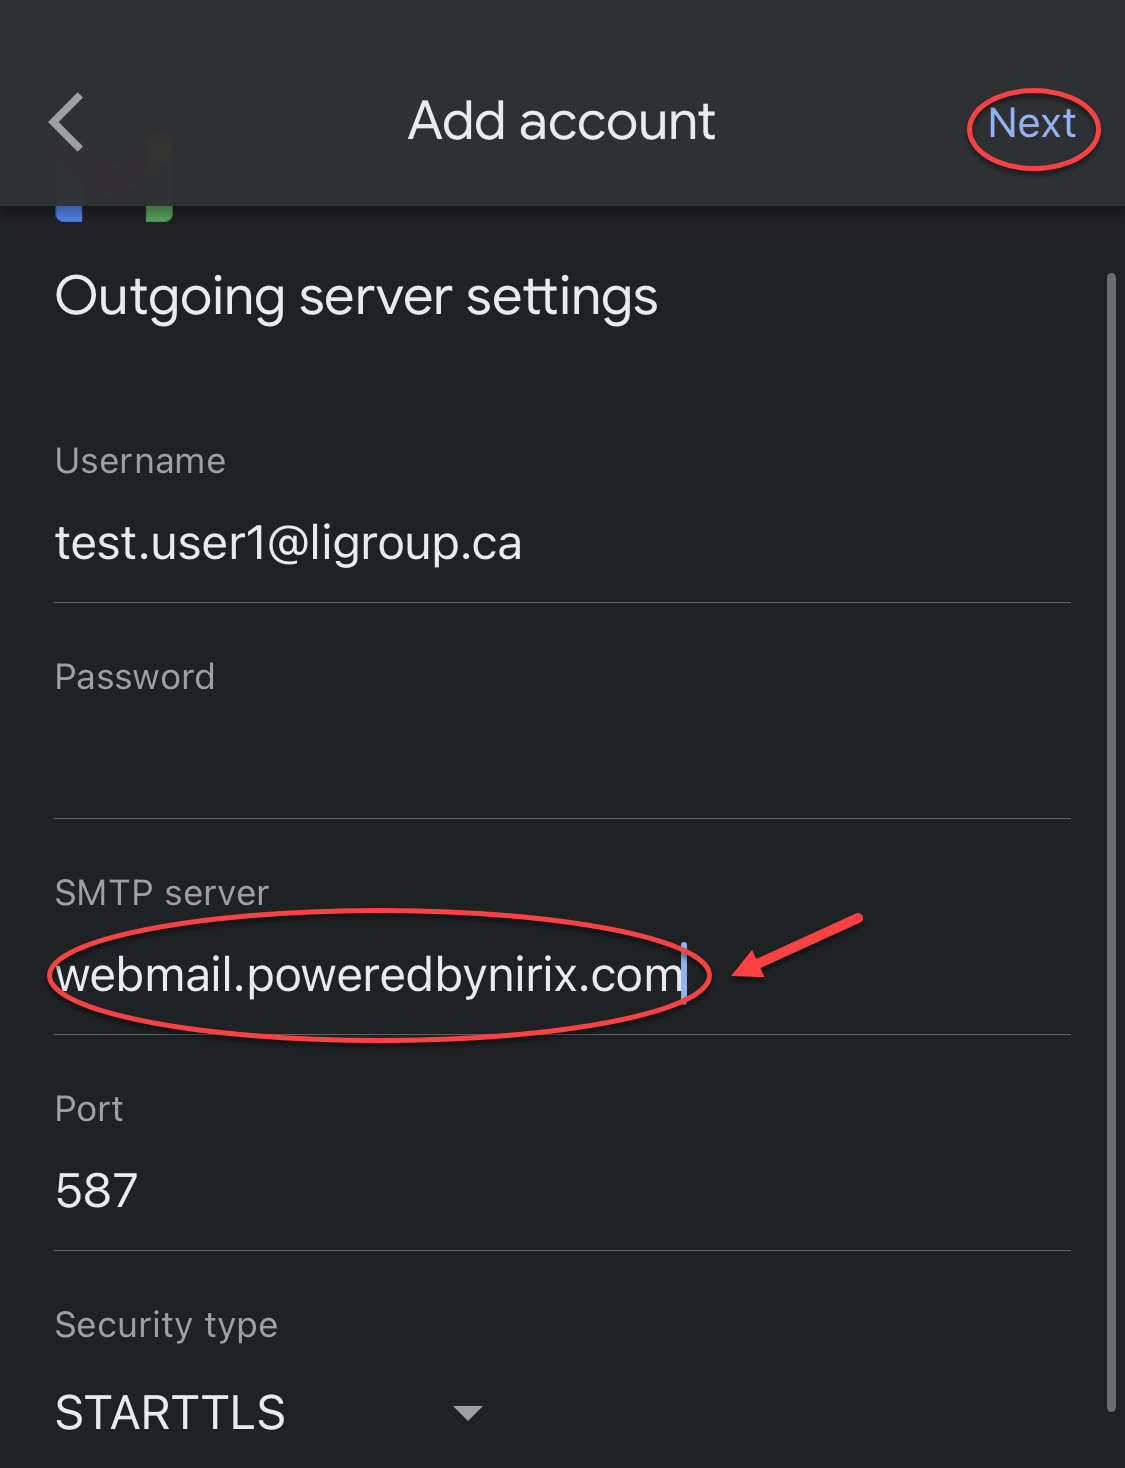 | |
Your account is ready - you’ll just need to enter your name. | 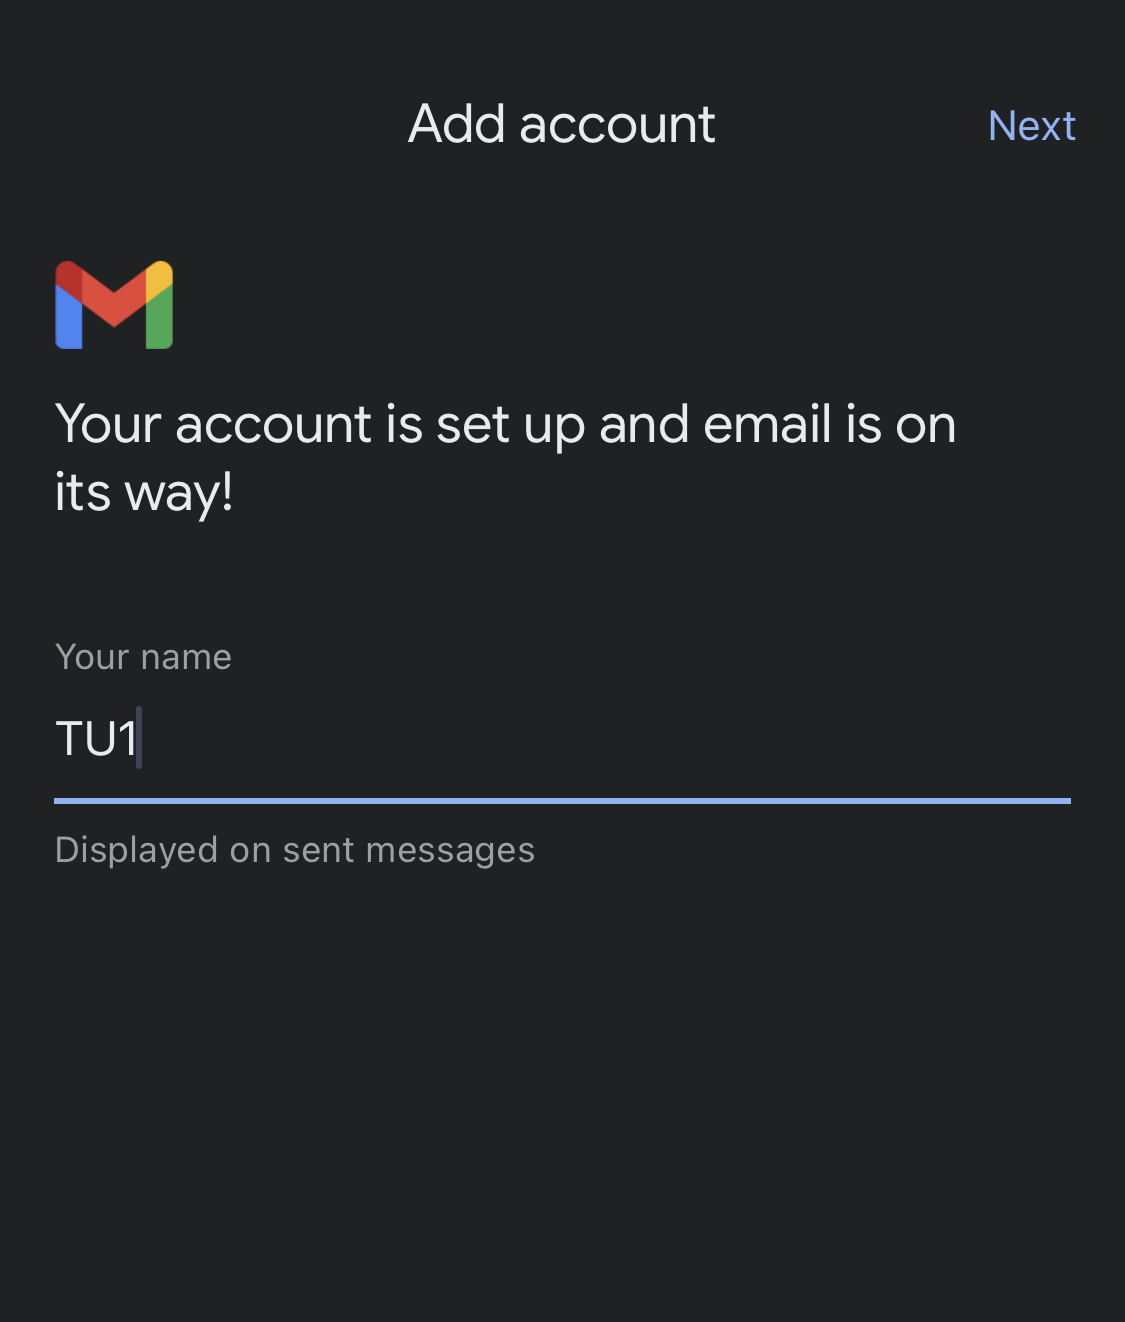 |
| Info |
|---|
The changes documented above are specific to the NIRIX Shared Hosting Environment only. |
...